
2019 - progress
2019 - progress
2019, january
During the really cold and nasty parts of the winter, I can work in relative comfort in the workshop, so that's what I've been dong.
I bought the oak for the new back door and for the second, larger, widow in the S facade and have been working on these a few hours at a time. I have also advanced quite a bit on the studding and dry lining inside and on the electrics : cables pulled in etc.
What I haven't been doing is taking photos, so I'm afraid there is no record of work during the early part of 2019.
2019, june
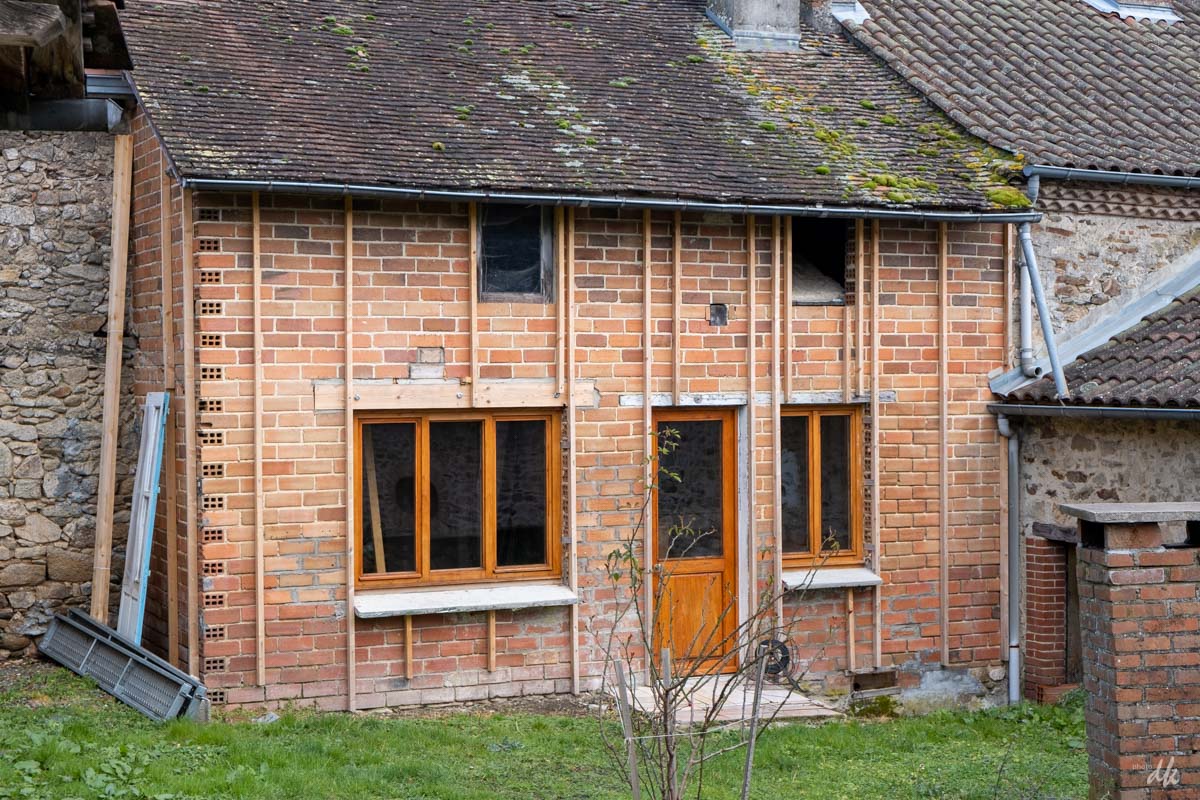
Progress visible from the outside ! Old widow removed and acros and support beam installed in a hole in the wall, ready to cut out the brickwork for the larger window.
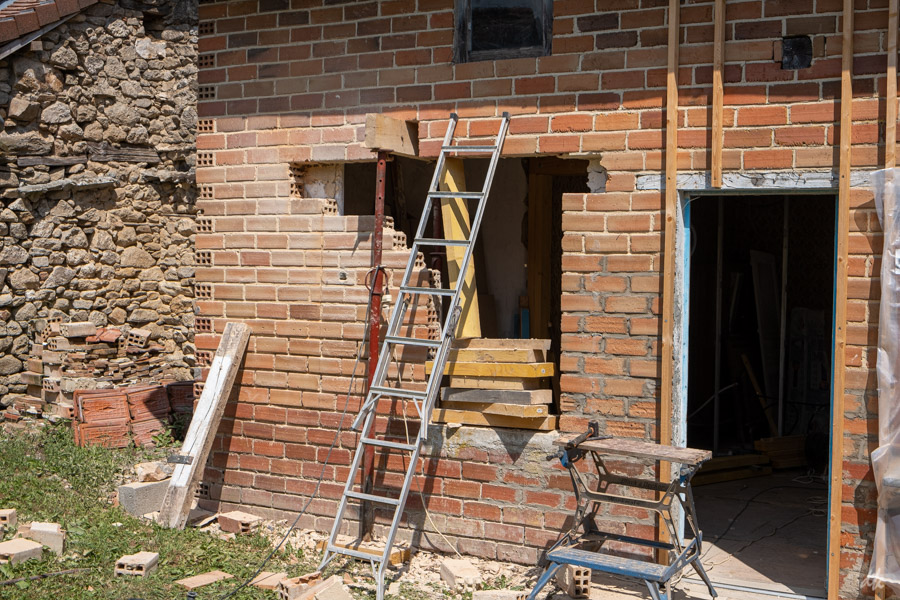
By late june the hole was cleared and the new lintel installed.
Next job was to create some forms and cast the window cill in situ. This needs to be quite deep front to back as it needs to span the future external insulation.
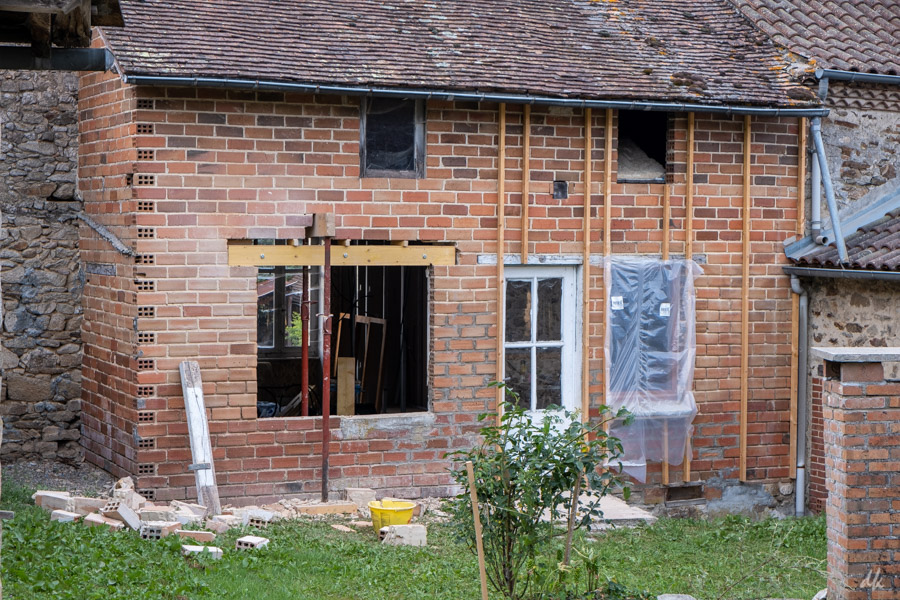
You can see the one for the small window under the poly on the right. The poly is to keep weather and stray cats out until the glass is fitted.
Here it is done, no progress shots I'm afraid.
2019 july/august
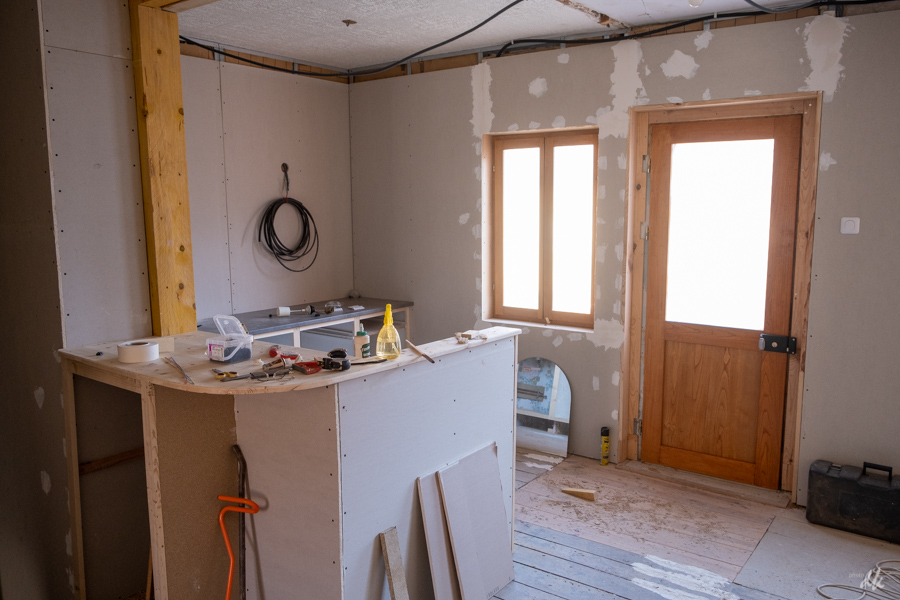
Quite a bit of progress on the inside, including the half wall to divide the kitchen corner from the main living area, partition walls for the small bedroom and some work on the kitchen cabinets. The back door is also installed on some brilliant adjustable hinges I found on line.
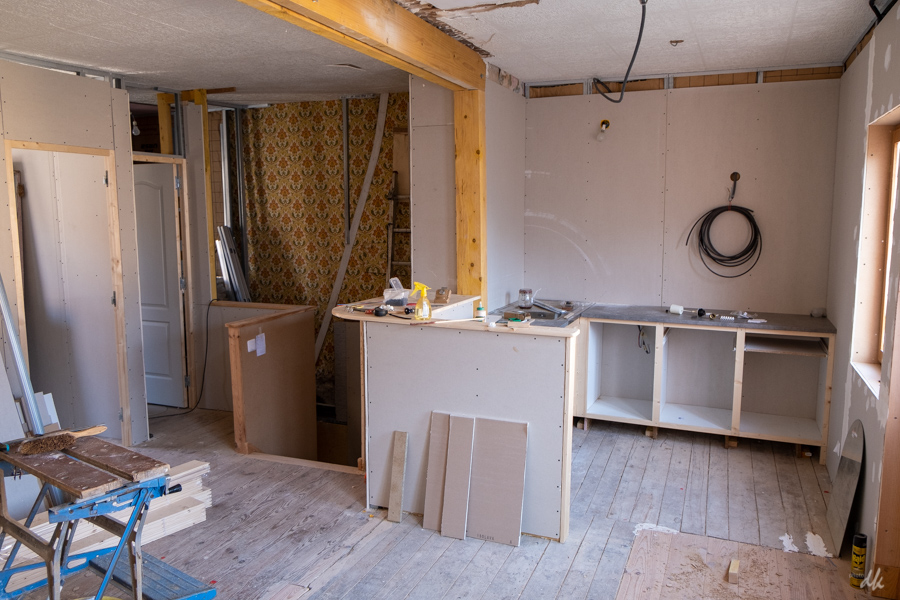
Here I have to confess to a stupid mistake. The kitchen corner is wildly out of square - not unusual in old buildings like this - the angle between the two parts of the L shaped work top is nearly 100°. OK, lots of care to measure the angles and mark up before cutting the worktop, only to find I'd made a perfect mirror image of what I needed. Damn !! Fortunately the DIY Shed still had the same pattern in stock.
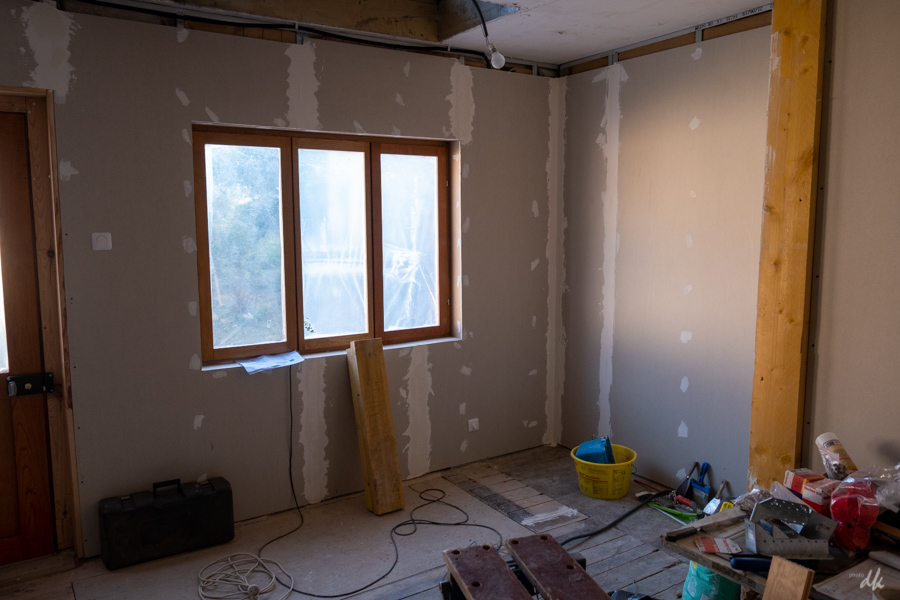
Here Isabelle has started on the plasterboard joints. Looks like she's better at it than I am - fortunately.
The gap at the top is of no consequence as there will be a false ceiling to allow space for insulation (the attic is already boarded, so cant put it there) and also the wiring, especially downstairs.
2019 september
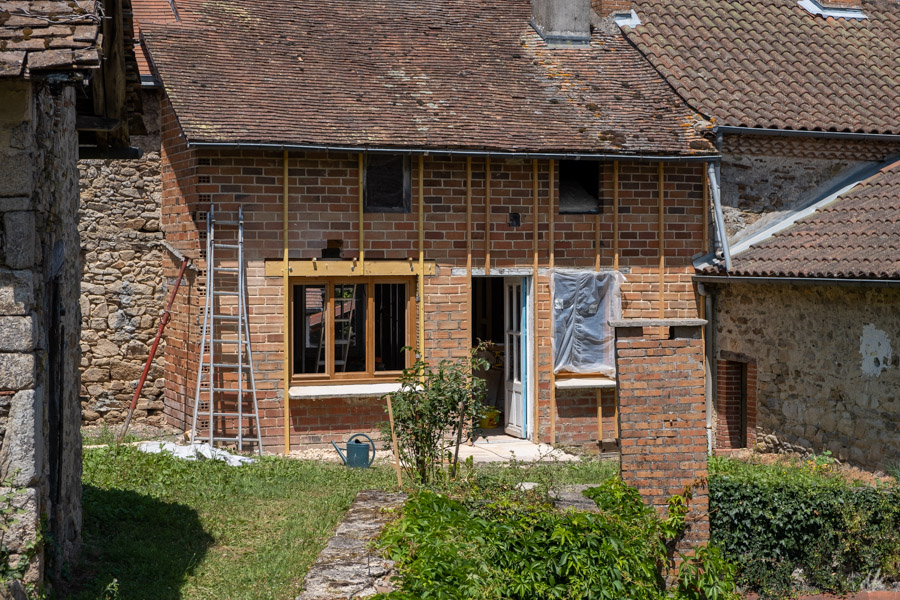
Glass delivered and installed so I can take the polythene down.
Now started on the partition and dry liner walls downstairs to allow Isabelle some space to work on the joints upstairs.
2019 october
Framing for the dry liner etc downstairs is now completed - difficult to photograph as the windows are boarded up for security so there is not much light.
Because the house is built into a hill, the back of the ground floor is below ground and under heavy rain conditions there is some seepage into the cellar - so...while working on this part of the house I've excavated and found bed rock at about 30cm depth. It seems that water soaks down from the surface, hits the rock, then runs along it under the house. I decided to excavate a sump in the rock, cut drainage channels leading to it and install a float activated sump pump. A day's heavy work with rock drills and a big breaker ! Then shuttering, big hardcore and poured concrete to replace the old earth floor. It works really well, everything has dried out in just a few weeks despite constant exceptionally heavy rain.
Found the little pump on line, 12v bilge pump designed for small boats and a computer power supply - all for around 35€. I've installed the power supply in a wall-mounted sealed plastic box with an on/off switch and indicator light.
2019 november
Constant heavy rain has meant it was difficult to fetch plaster board for the dry liner and internal walls (open trailer !) so I've been working on the electrics and on woodwork.
The distribution board is installed and temporary lighting downstairs also. I've bought the timber for the front door and the new windows.
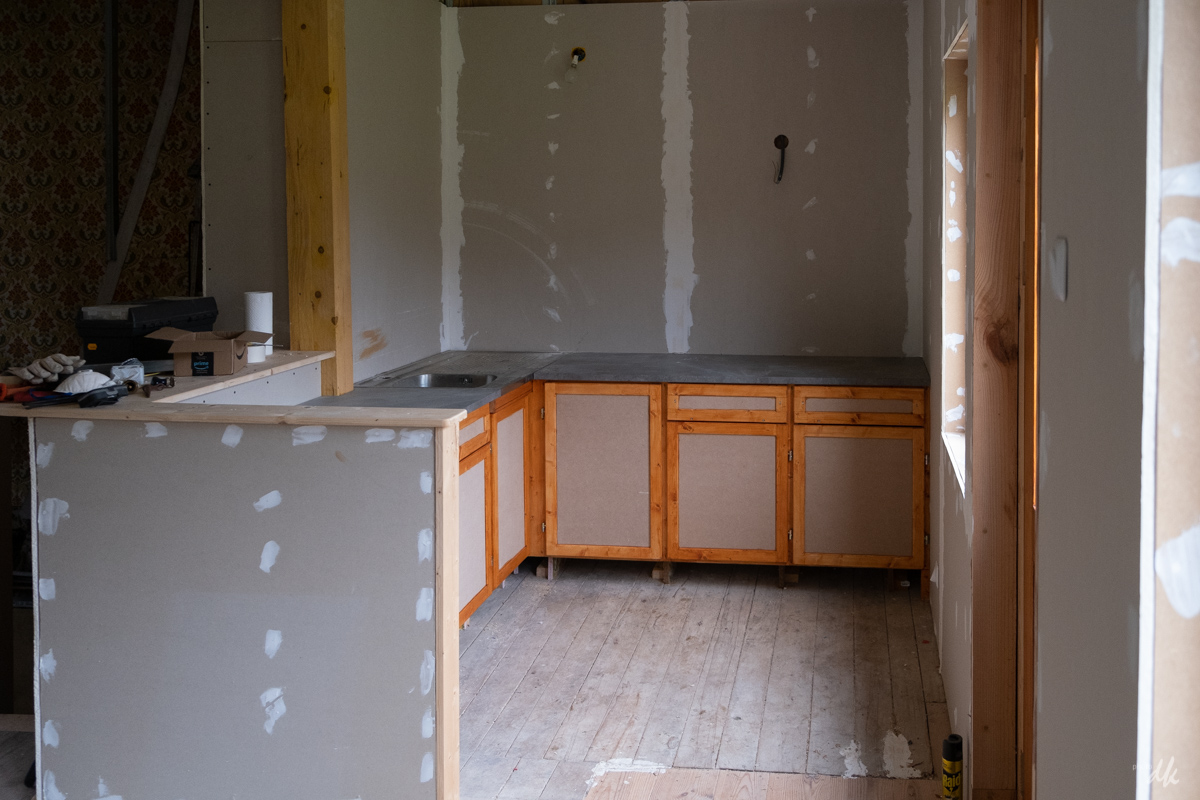
I've also made doors and drawer fronts for the kitchen and installed them. These are simple cope and stick frames in deal with MDF panels, this is to allow easy repairs if needed because the house will be rented out. Much better than commercial kitchen units which, once chipped or damaged are hard or even impossible to repair and usually cant be replaced as the style is no longer available after a year or two. A first coat of lasure has come up very orange, I may need to change this. The MDF panels will be painted to match whatever colours we choose for the kitchen area.