
2013 July - making a start
Workshop build - a start
2013, july
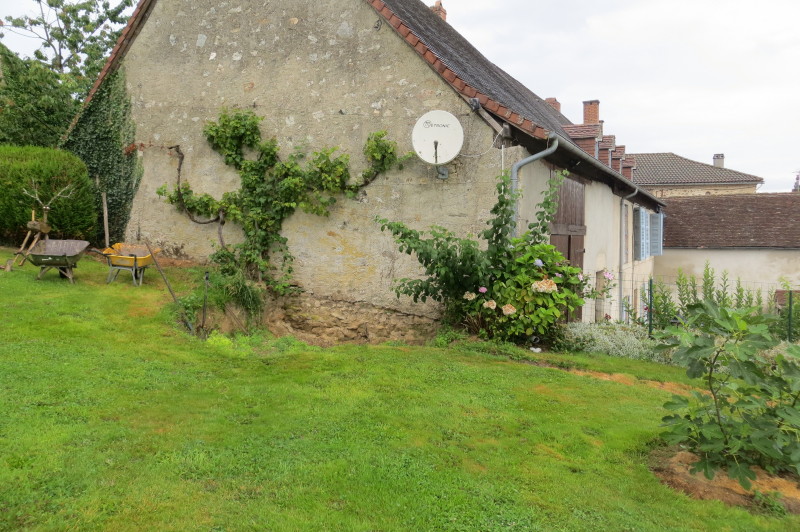
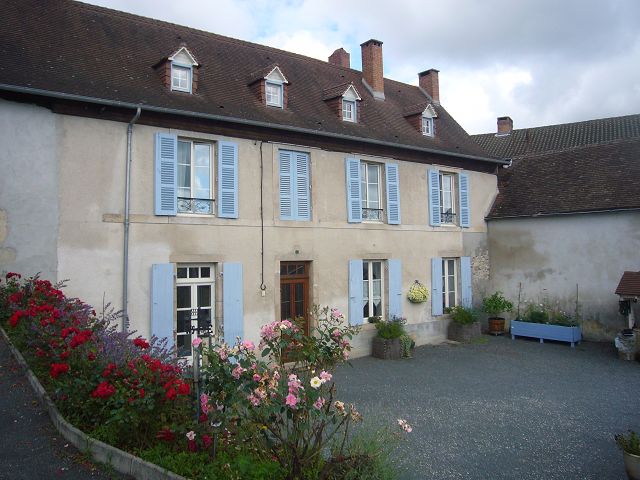 The house at Rue Darnet is a former farm dating from the late 1700's or early 1800's. It is now surrounded by the expanded town, the land sold off many years ago for development. The barn is attached to the house - I'm standing in front of it to take the photo on the left.
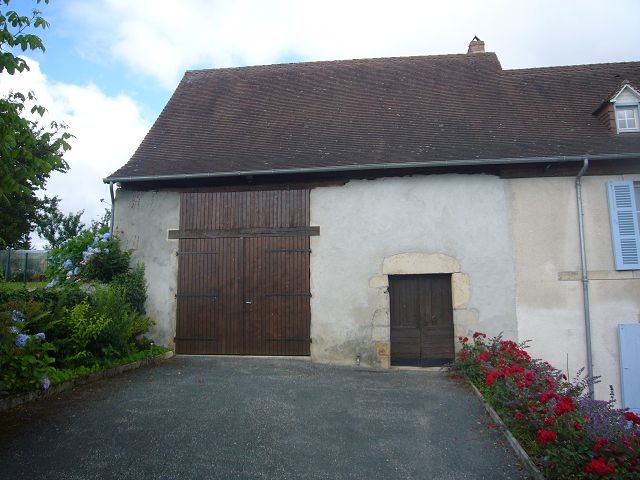
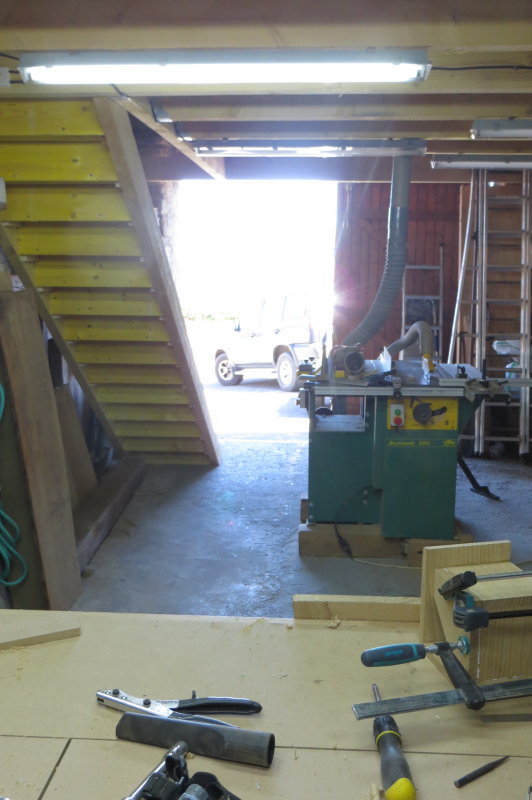
It is roughly 10m x 10m, divided in two by a massive wooden structure built with 30cm x 30cm oak beams that made one space for the cows and one space for the tools and equipment for the farm.
After the conversion from farm to house around 1980, the "tools" part already housed the central heating boiler, the fuel tank and some fairly well equipped storage space. It was also already fitted out with a hay loft which I decided to keep.
The plan for the workshop was therefore to put the main working space on the ground floor in the "cows" half and to build a mezzanine floor above to to provide more space and also to reduce the ceiling height of the working area to make the whole more practical to heat.
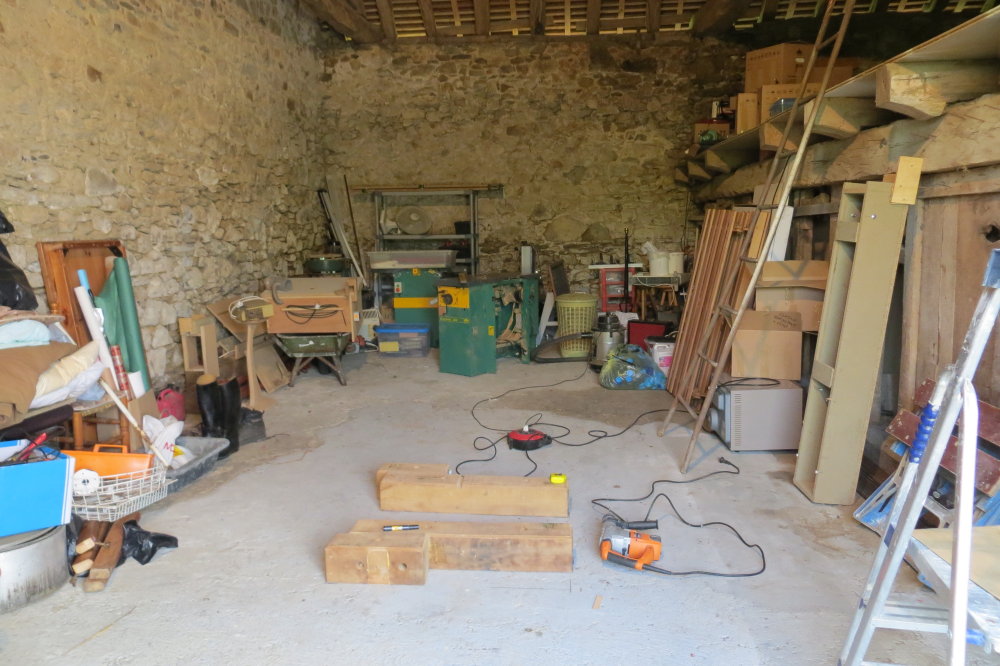 Here it is more or less as it was on arrival :
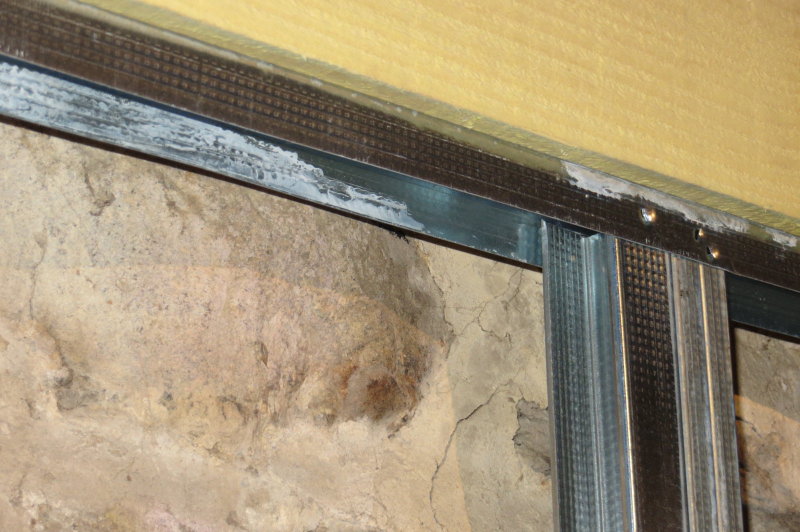
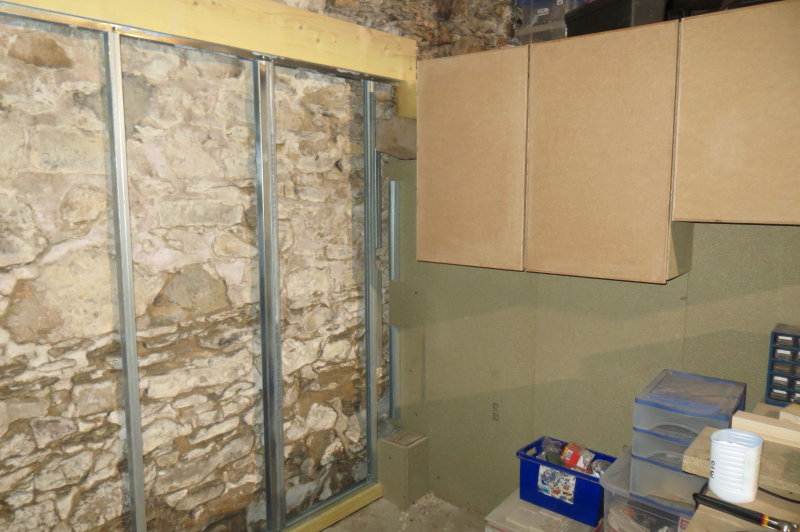
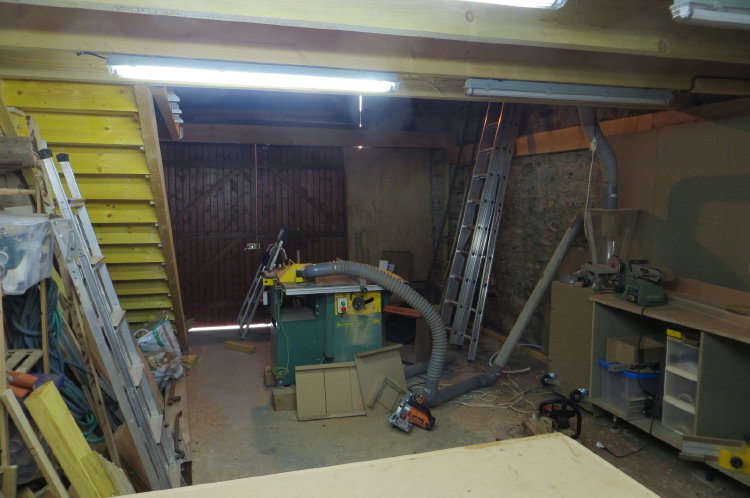
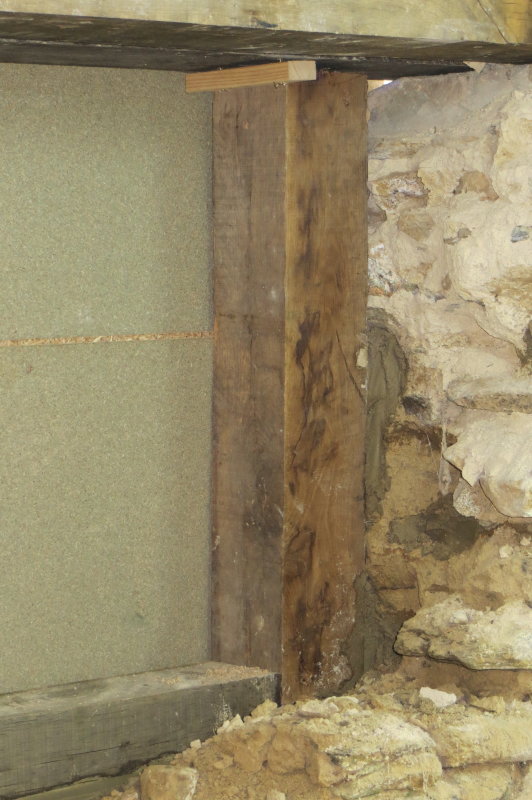
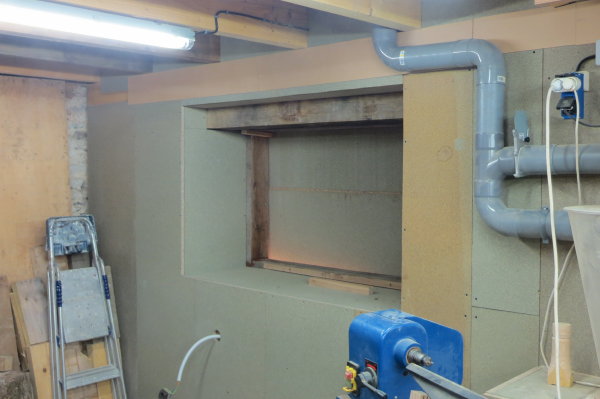
Old stone walls are charming but not very practical for fitting cupboards etc and also quite poor insulators, so step one was to fit a dry liner right around the inside of the space and to build it in such a way that it could support the beams for the mezzanine.
This was done with BIG construction timber lined with the french system of galvanised steel sections to support the rock-wool insulation. In a house this would normally be clad in plaster board, but I wanted something more solid for fixing to, so used water-resistant chipboard so that I could attach cupboards etc wherever I wanted.
Here are the first steps showing the form of the construction :
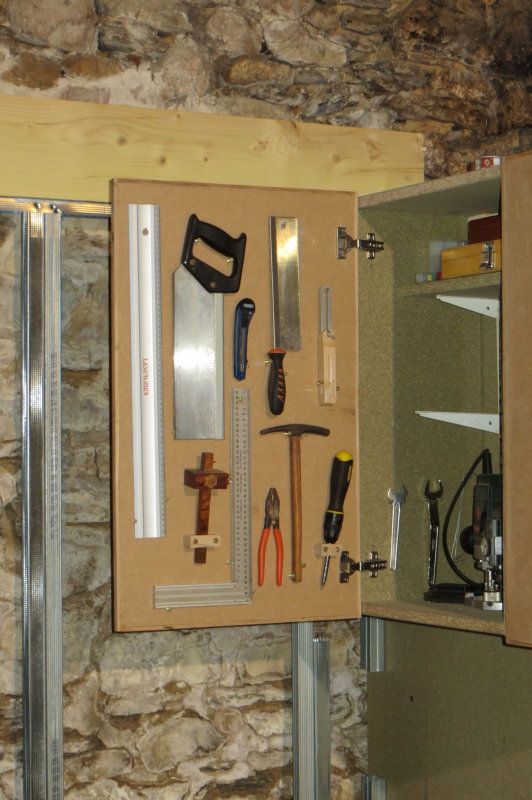
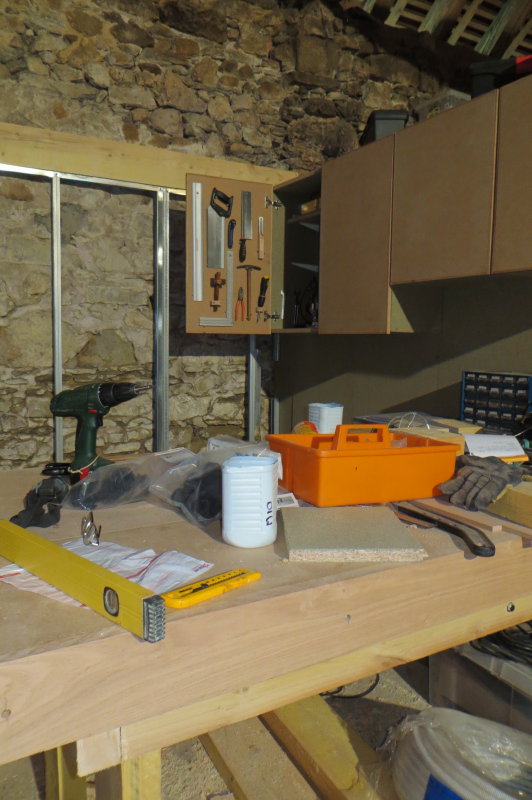
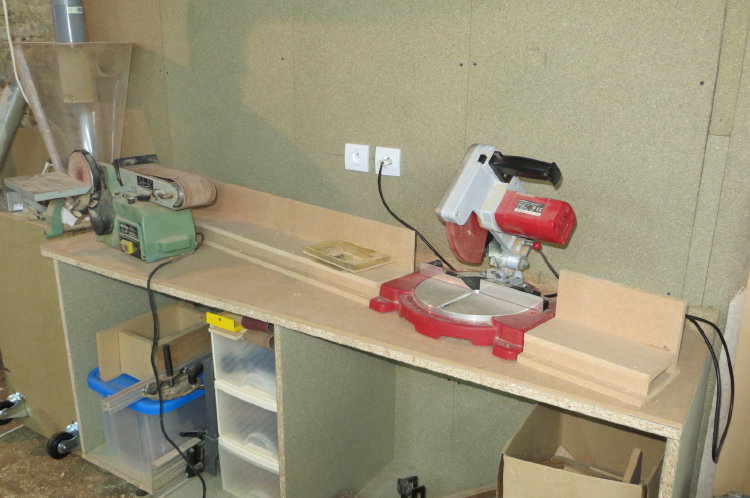
Late summer 2013 : Because it was imperative to have a workbench and some initial tool storage as soon as possible, I built some cupboards and the bench as soon as the relevant part of the wall was finished.
The bench was made using the same system of torsion boxes that I used at Le Gravier.
Very rigid and the lift out sections in the middle can be placed bottom up to provide a continuous work surface, bottom down to provide tool or parts storage or removed entirely allow work to be clamped easily or provide open space for roughing sheet materials with a jigsaw.
Here are some further shots of progress.


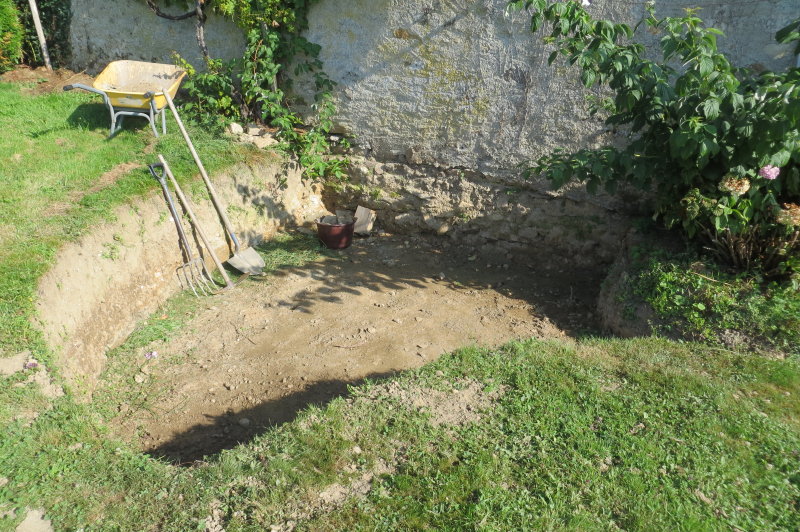
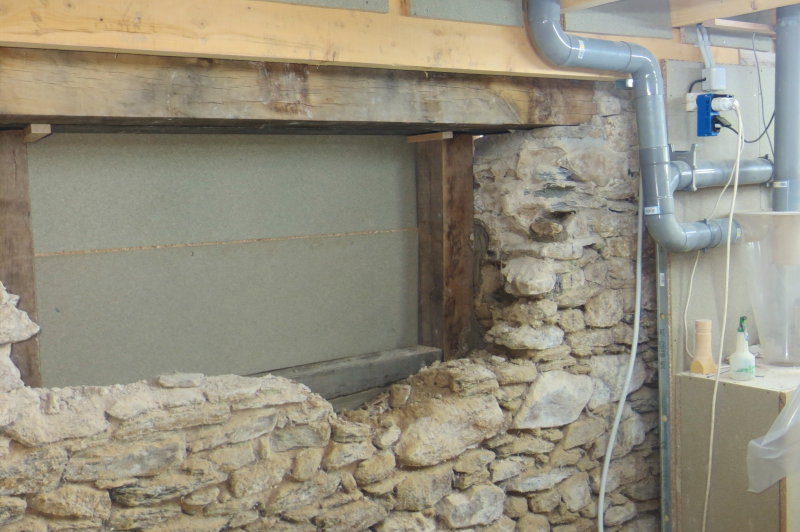
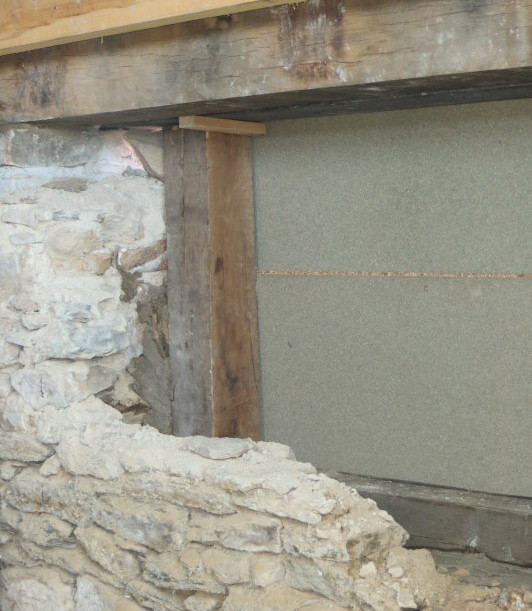
Window in the workshop2014, July 28thJust like the barn at my previous home, the old barn has no natural light. The barn is attached to the house, so that wall cannot have windows, the front has big barn doors but we are in a conservation area so changing those for lots of glass is not permitted. Because the barn is built into a slope the west wall is fully below ground, so that leaves the south wall which is along the rise of the hill, so partly below ground. The powers that be have agreed that I can put a window into the south wall provided it is all in oak (including the lintel etc.) and so I've started excavating the outside so that the window will be at a sensible height inside.Here is the site : This is the only practical approach open to me, as putting the window any higher will place it above the workshop ceiling/mezzanine floor. |
 |
|
|
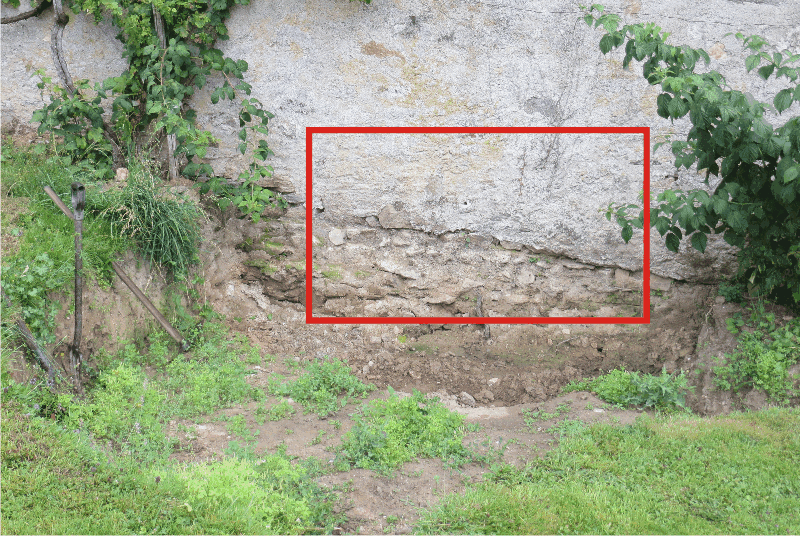
The plan is to use the stone from the wall (70cm thick) to build a retaining wall for the excavation. The window position is marked in red, it's about 2m by 1m. Bit more digging to do, then I attack the wall !! |
|
|
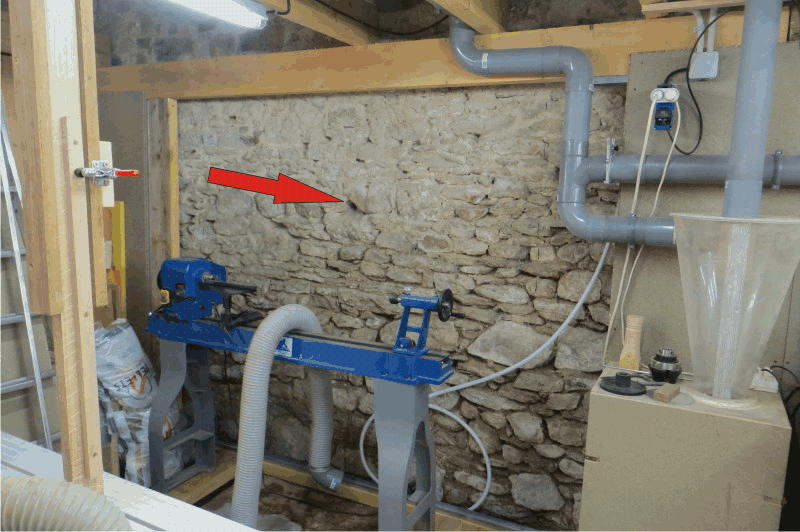
Here is the same view from inside - the red arrow points to the pilot hole I drilled which is roughly at the original ground level on the outside. |
| 2014, August 5th
Had a surge of energy today and cleared out the rest of the excavation ! Around 20 barrows of say 80kg each. Now I need a couple of days off to let my aching back recover. |
 |
|
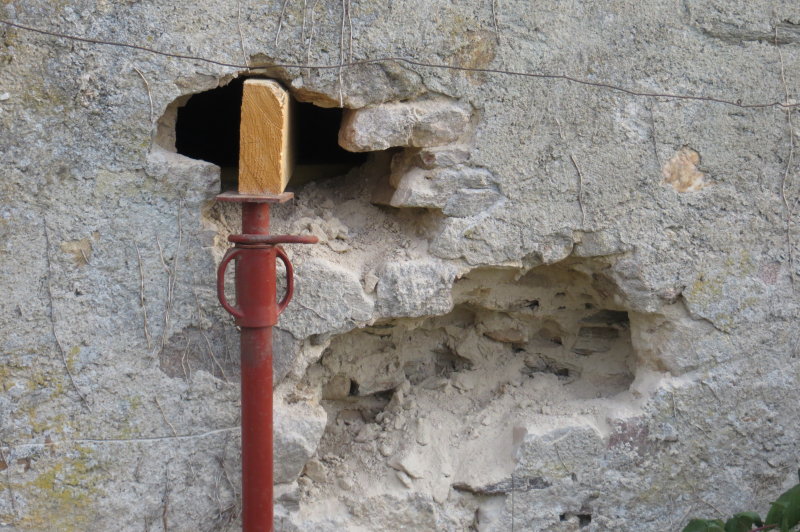
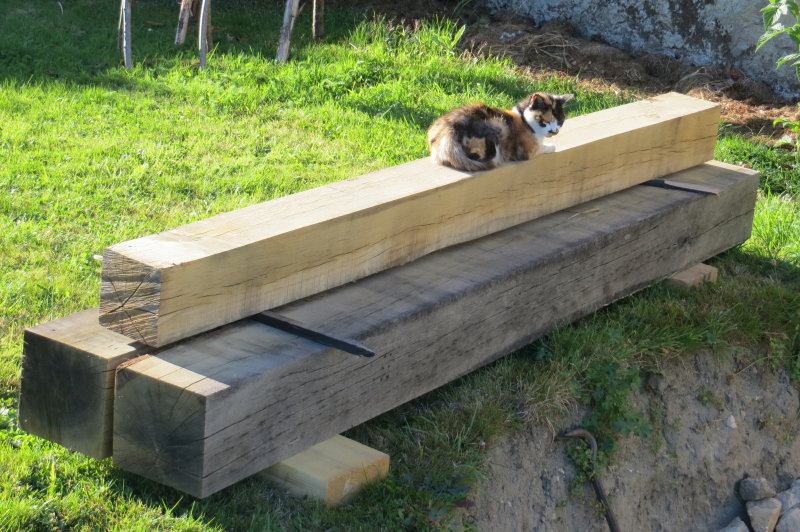
2014, September 23rd I did something similar at my former home, but the masonry here is a lot tougher - this is going to be harder work than I had imagined ! 2014, September 29th Two lintels, one at the front, one at the back, 200 x 200 x 2500, so around 85kg each ! A snip at 60€ each. Unfortunately it is raining today, so no progress outdoors. Perhaps tomorrow ? |
 |
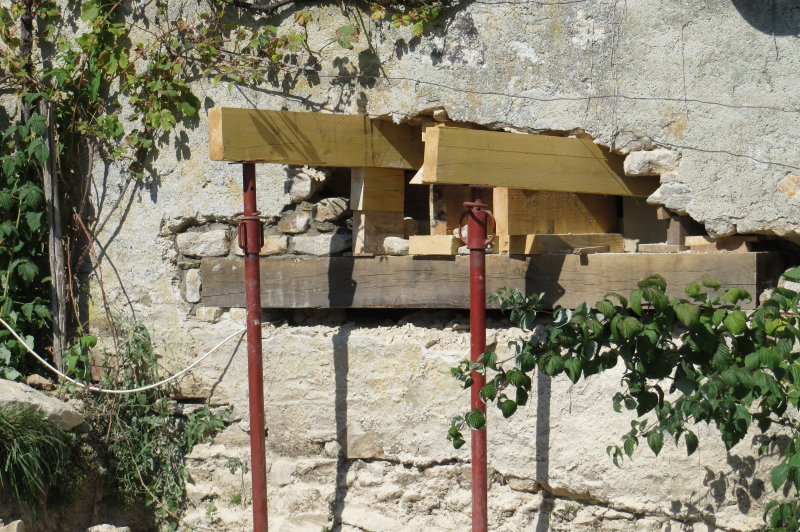 |
2014, October 3th Lifting the lintels into place was an interesting challenge - they are far too heavy at 85/90kg each to simply be lifted in one go ! Here you can see the first of the infill stonework (on the left) built this morning. |
|
2014, October 14th A week or so has passed and I've worked on refilling above the lintels as often as I could bearing in mind other activities and some foul weather, probably around 12h in all. It is done at last ! Infill with irregular stone is one of the most tedious jobs I've ever done. The access gets smaller and smaller as you work, the thickness of the wall makes the middle part quite difficult to reach and the stones have to be selected to fit the space vertically as well as horizontally. As if that was not enough, when you remove the supports as the job progresses, you risk large chunks dropping onto your arm as you work - the old lime mortar really has no "sticking" properties at all. Not a job I would want to repeat. I propose to give myself a break and do something else for a week or so before cutting out below the lintel for the window itself. Then it will be a few days to create and tidy the aperture, a week perhaps to make the window from scratch in oak and I'll be installed in a workshop with natural light before the frosts... |
 |
|
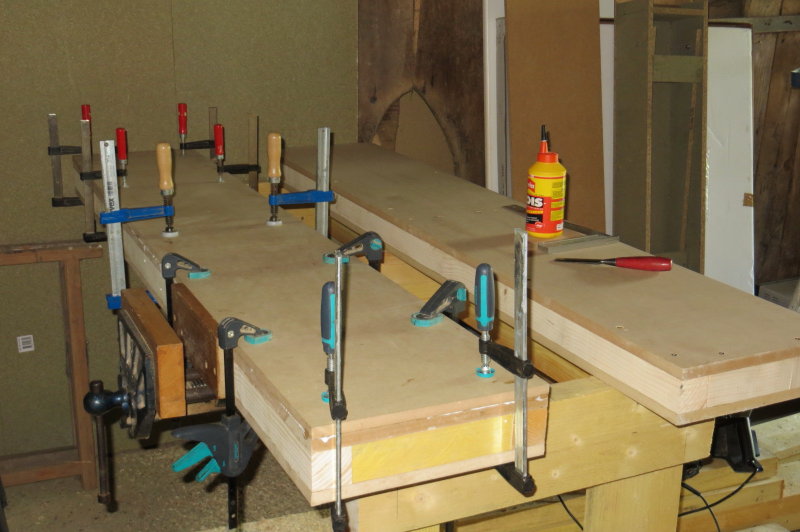
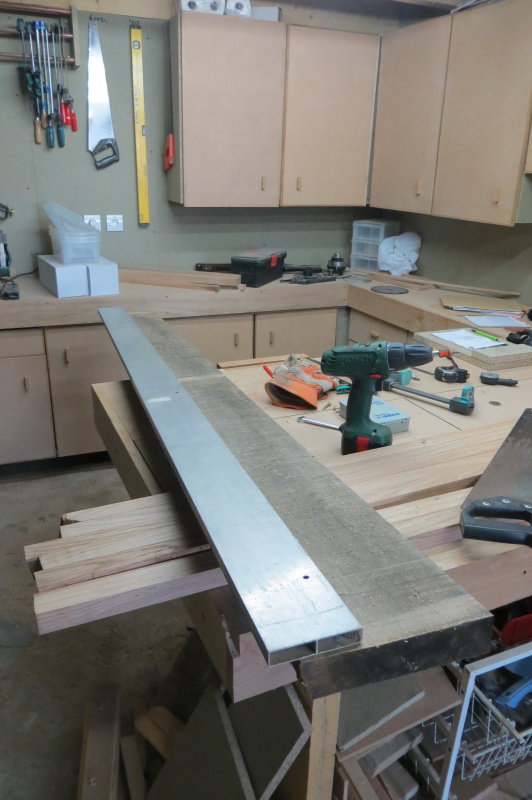
2014, November 2nd Spent yesterday milling up the timber for the window and frame in the workshop. Started with two 3m long rough sawn 45mm oak boards that I've had in the store for several years. First step was to reduce the 3m boards to 2m and 1m which correspond roughly to the length and height I will need. Then to take off the live edge, did this with a 2m masons straight edge (aluminium extrusion) screwed into the opposite live edge to give me something straight to ride the rip fence. Worked really well. Then rip to rough section and plane and thickness most of it. The remainder I then re-sawed to provide the thinner stock I needed for some parts. Did this on the TS, cutting in from both sides as it it too wide (8cm) to do in one pass. Prefer the TS for this as 2m sections are hard to handle well on the bandsaw with it's little table. All the ripping was done with a new thin kerf blade. Really pleased with it. However, I had forgotten that I will need a thinner riving knife, and ended up doing it with the riving knife removed. It was all straight grained, so got away without any problems. |
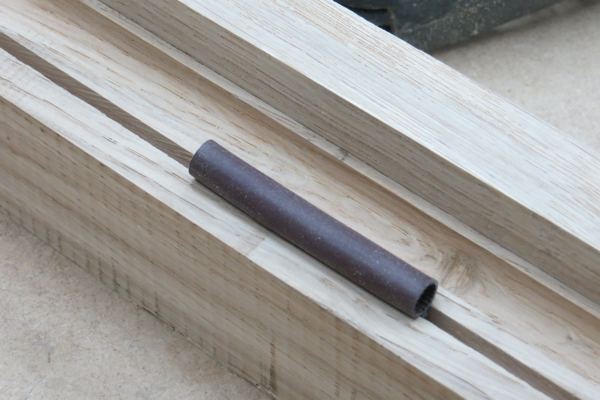
Here is a photo of the profile for the bottom of the frame section, with a scrap of seal fitted in the slot for it.
There will be 4 drain holes to the outside from the drain channel spaced along the length - as per normal practice here. The window will open inwards, like all windows in France, but tilt only, just for a tad of ventilation. |
|
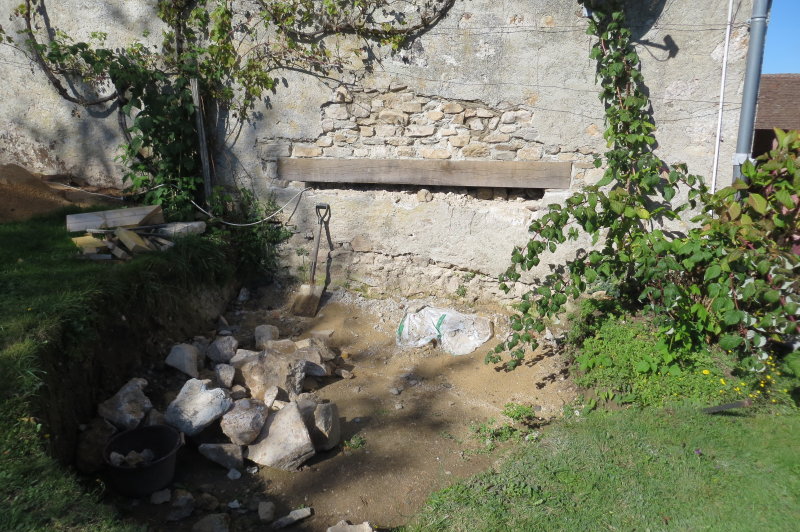
2014, November 9th Had an overdose of motivation yesterday and demolished the wall below the lintels to start fitting the window. 1m80 x 1m x 60cm, that's over 2 tonnes of material demolished, sorted, stacked (the stone) barrowed away (the old mortar) and tidied up. Finished this at around 3pm and decided to clean up the surrounding stonework and make the "bed" for the bottom beam. Got carried away and actually laid it, got it level first time too, then cut the uprights to length and fitted them - loose tenoned into the lintel and bottom beam - and ... the light failed with a load of mortar made up ! Finished as much of the infill as I could see to do in the dark and cleaned up by around 20h ! No photos of the outside for the moment as I fitted a couple of sheets of hydrofuge chipboard to keep the rain off and to keep visitors out. |
The big beam at the bottom and at the sides is to mimic the traditional form of construction. This was a condition of the planning consent, though I would have done it this way anyway for aesthetic reasons. I will add the traditional pegs at top and bottom of the uprights (they would have been drawbored in the 19th C) but mine will only be dummies. I could not see a simple way to build downwards from the lintel and fit uprights with traditional tenons. It would have involved "hanging" everything from the lintel with the bottom beam suspended over a space big enough to allow the tenons to be inserted and then the stone infilled underneath it after. Didnt fancy that, so my "tenons" are large chunks of 20mm dia steel rod into drilled holes deep enough to house the whole tenon in the upper part and allowed to drop into sockets in the lower part as they came into alignment. A rebate in the lower beam keeps things square and resists any tendency of the old wall to push out towards the aperture. Fast and effective. The oak will corrode the steel of course, but 20mm will last quite a while I think and the corrosion will lock them tighter into place ! |
|
Of course, in the traditional form, there would have been a matching frame on the inside, linked by horizontals in the thickness of the wall. This arrangement avoided having outside corners on the masonry and tied everything together in the days before steel masonry fixings. No point in doing this here as the inside will be hidden by the dry lining which will go into the aperture and up to the back of the window frame. |
I confess I also chickened out as far as the width of the aperture is concerned. When I saw how close to the sections of old rubble wall supporting the lintel I would need to demolish to achieve the width I had hoped for, I played safe and left rather more in place than I'd originally planned. A consolation is that the proportions of the window aperture are rather more pleasing than the very wide low window I had sketched up. A bit less light of course, but you cant have everything. It remains only to remove the last of the stone from the inside on the left and point up before starting to make and fit the actual window. |
|
2014, November 19th
Today I started to make up the window frame itself. The sections were prepared some time ago when it was too wet to work outside, so today was cutting to length, making the bridle joints and gluing up. I cut the bridle joints by making one cut at the base of the joint using the hollow chisel morticer, then cutting up to that using the bandsaw. It worked really well. The tenons were cut on the TS using a crosscut sled as I always do. It means a lot of passes with a single blade, but the shoulders are always perfect, the tenons dead centre on the stock and you can sneak up on a fit easily by raising the blade a fraction. |
As always with this type of job, the work is too big for my limited supply of clamps, so only half is actually glued at present and I'm posting this while I wait for the glue to dry so that I can use the clamps on the other half ! If all goes to plan I should finish this today and be ready to start making the opening light tomorrow. Then I can order the double glazing ! |
|
2014, November 25th Quite a lot done during the last couple of days. The window is essentially built, the glass is ordered. I will apply a finish tomorrow/thurs and fit it in the next couple of days. However.... this weekend is the Christmas market organised by the association of which I'm president and it takes a lot of work, so the weekend is booked ! The club provides lunch for the vendors and light snacks for the visitors (hundreds) plus games for the kids. The photo club, which is my main interest, will be doing Father Christmas for the kids, plus photos with prints on the spot using a tethered camera with studio lights and a fast photo printer. Quite stressfull to do, but fun ! The other current issue is the table saw. The thread has stripped on the blade height adjuster. I've dismantled it all, and there are two threaded parts, both damaged, and both quite tricky, complicated shapes. Difficult to reproduce with less than a fully equipped engineering workshop. Lets hope there are spares available - I've sent off emails here and there and await replies. In the meantime I cant use the TS which is a bit of a blow. |
2014, December 16th
|
|
2014, December 18th The window is now fitted and it just remains to tidy up the mastic and apply finish to the glazing beads etc. At last the shop is closed to the elements !
I want to apply a finish on the outside of the lintels etc to get the colours more uniform, but it will have to wait |
|
|
A post script : 2014, December 29th One or two UK friends have asked about the window design, so here is the x-section drawing I used to build it from. This is the classic form in France, though normally with the hinges at the side of course. Modern all singing all dancing ones are a bit more complicated regarding seals etc, but for my purposes this is more than adequate. Not really visible in the photo, but I've fitted 10mm copper pipe in the drain holes. They always get bunged up by spiders etc, and when you poke them out, any finish you managed to get on the inside of the hole is quickly damaged leaving the wood vulnerable to the water that is often present in the drain hole. Copper tube in the holes, expoxied in, protects the wood. |
 |
| Back to top |
 I've acquired the oak lintels for above the window...
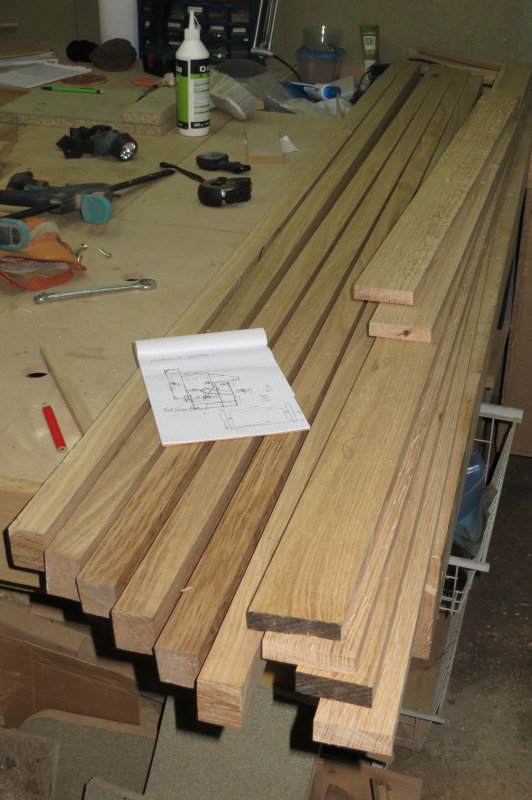
 Since the last posting, I've pointed up the inside of the aperture stonework, then extended the insulation and dry lining up to the aperture on all four sides and around the inside up to the back of the oak framing. This was done a few days ago.
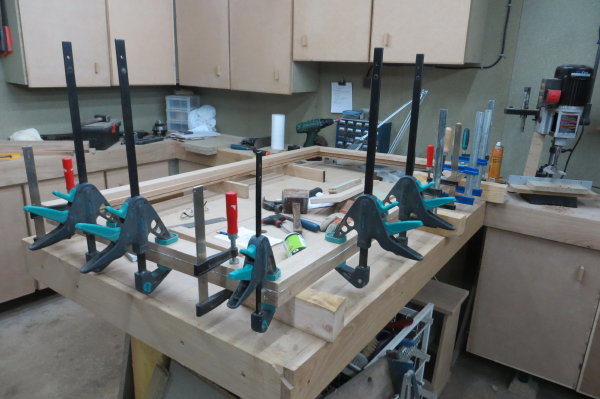
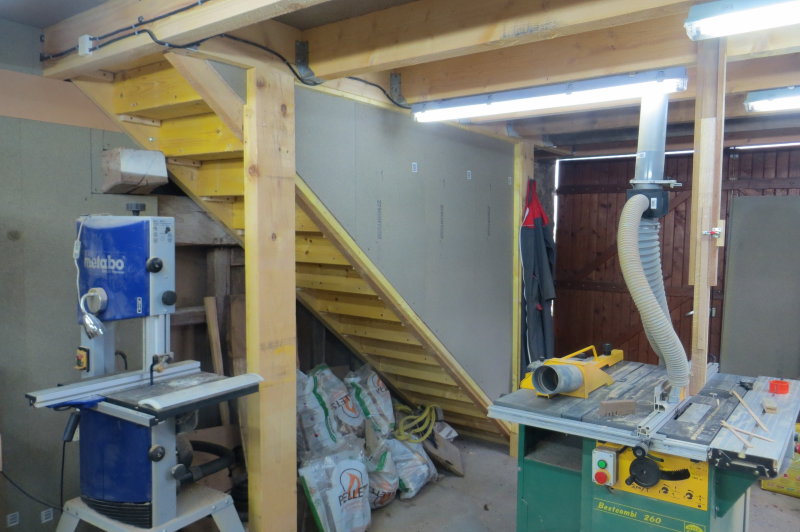 Well that took up a bunch of time ! The TS is repaired, though it took quite a while to locate and wait for delivery of parts, and in the meantime I couldn't fit the window as I didnt have any glazing beads made and I did not want to compromise the design by using other than oak. Also done during the wait for the TS - I've boxed in the stairs to the 1st floor and fitted a door at the bottom - all in aid of making the shop heatable in the winter.
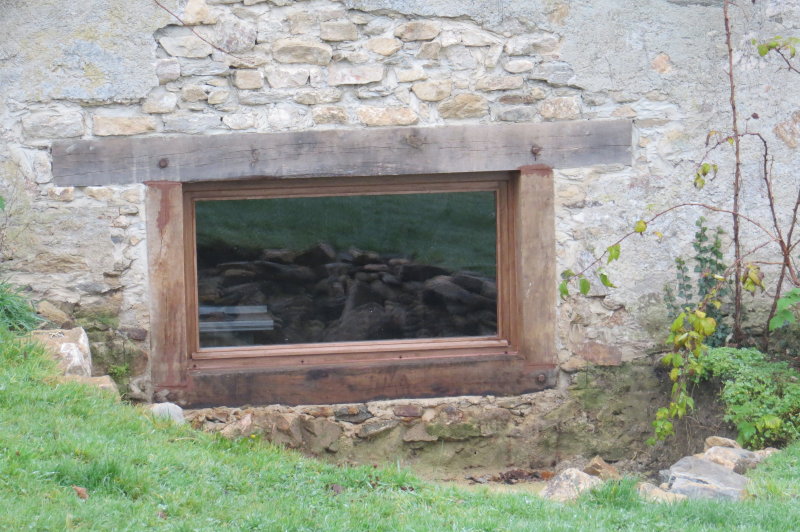
.jpg)