
2014 - workshop upgrades
- Fobco drill
- Dust control at the bench
- Cyclone dust collection
- A lathe at last
- Stow-away router table
Fobco drill
 2014, September 5th
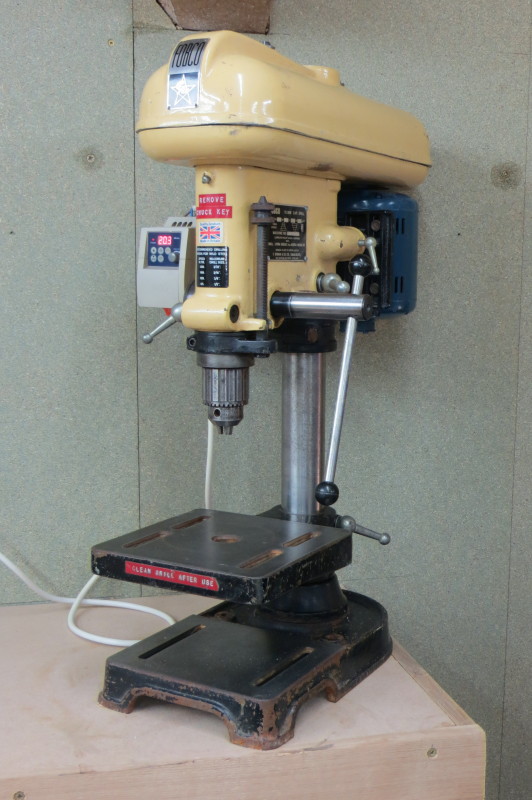
Thanks to the extraordinary generosity of Bob "9 fingers", I am now the proud owner of a beautifully restored Fobco pillar drill.
I've been looking for a machine of this quality for ages (massive cast iron parts, big solid bearings, even the pillar is solid, not a tube) and could find nothing comparable in France. I mentioned this on Woodhaven forum and Bob offered to try to find me one in the UK.
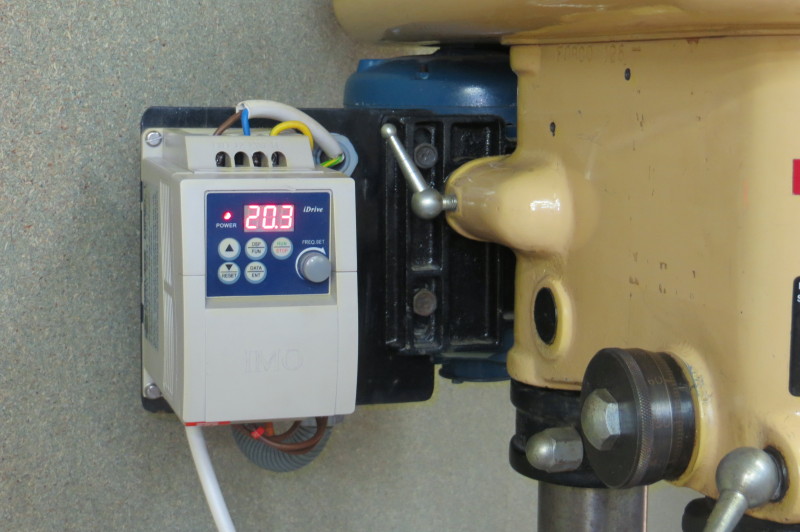 Here it is, tidied up, fitted with an electronic variable speed drive by Bob, and delivered to me today as he and his wife were passing en route to friends in the south. I'm overwhelmed !
It is a bit bigger than I'd allowed for, so for the moment it has to sit diagonally on the bench, but I'll extend the bench in the next week or so to acomodate it, it only needs another 5cm. That will allow the head to swing to the right to place the quill clear of the side of the bench for jobs deeper than the current max height.
Dust control at the bench
2015, March 24th
Quite a lot of snoring, quite a lot blocked sinuses and I'm gradually having to accept that I'm at least partially alergic to sawdust. Rather a handicap for a woodworker...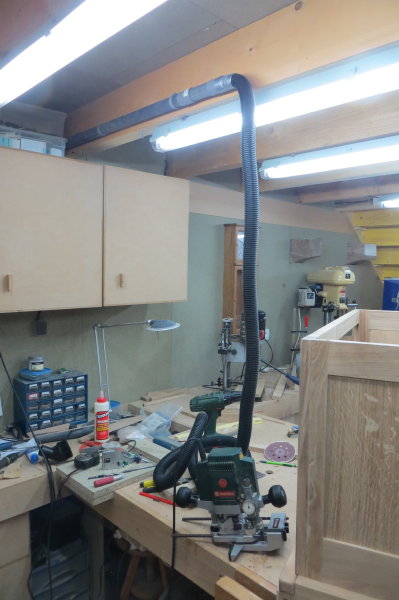
I dont plan to stop woodworking, so more effort on dust control required. The big machines are already well fitted out with a centralised extractor system with a cyclone and blast gates to control the flow. The extractor is in the attic, so any dust escaping the filter is not recirculated in the shop. So far so good, but probably the worst offenders, the orbital sander and a router used out of the table, are not covered and it is here that I've been suffering.
So... I've splashed out on 30 litre shopvac with a sychronised start, installed it in the attic but above the bench and wired and plumbed it to give me a dedicated power socket by the bench which triggers the vac and a rigid pipe along the ceiling above the bench where I can plug in a long flexible hose to the sander or router.
What a transformation ! Sanding has become a pleasure, no dust escapes at all. The suction is awesome - it really pulls the sander down on to the work, it's quite hard to lift it off ! With the router it's not quite so effective, but it gets most of it and pretty much all of the small stuff.
Time will tell if it's enough, but it is a huge improvement.

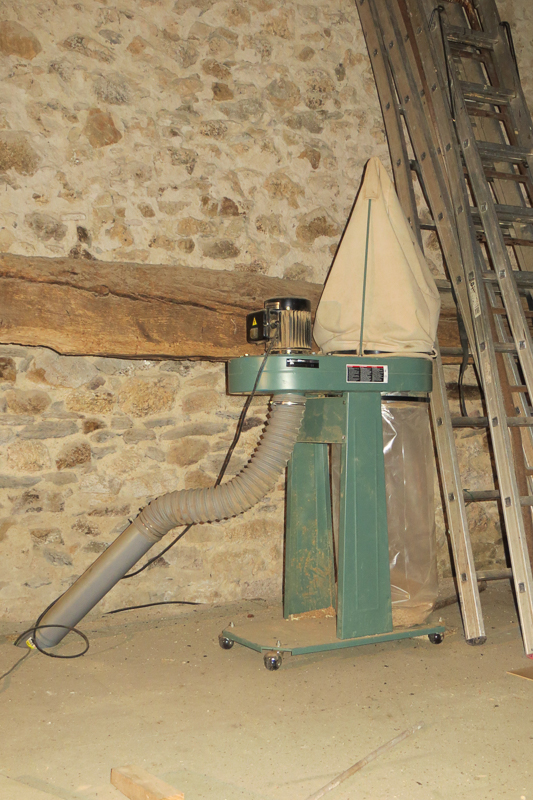
Cyclone dust collection
What I came up with was a box within a box, where the inner box can be removed for emptying.
The outer box has a neoprene type door weather seal around it to take up any irregularities, and is fixed in the first instance by 4 toggle clamps :

These just hold things in place, the main seal is due to the vacuum in the box which pulls everything tightly closed.
Since taking these pics, I've added wheels to the removable box so I can "wheelbarrow" it outside for emptying. Works very well.
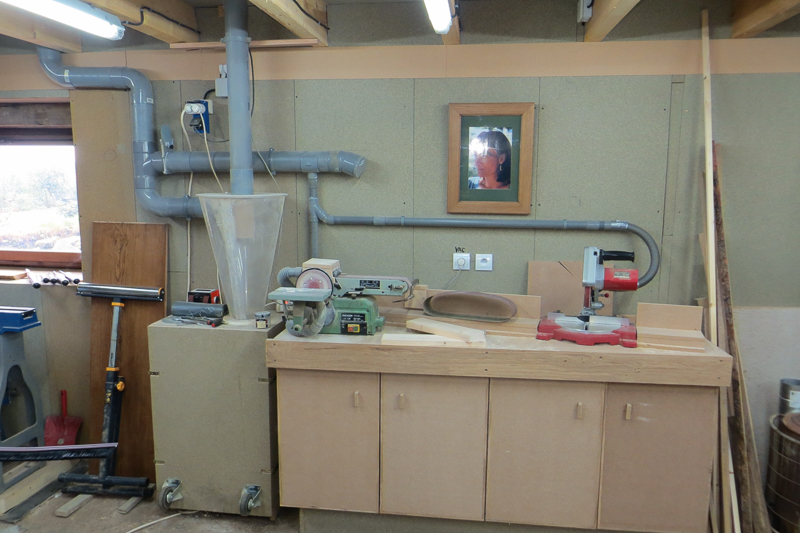
The above pics are from my old workshop, but the same unit is now installed at Rue-Darnet, here's a view of the whole including the extractor which is in the roof space above :
")
A lathe at last
2014, August
I've wanted a lathe for years, not because I especially wanted to turn bowls or other classic projects, but because furniture often needs round parts. In mid summer 2014 I found a small ad offering a lathe for sale about 50km away from us in Charente, so I went to see it, and of course bought it. A fairly basic but very solid cast iron bed, headstock can be turned through 90° to turn bigger stuff and it has a simple mechanical variable speed drive.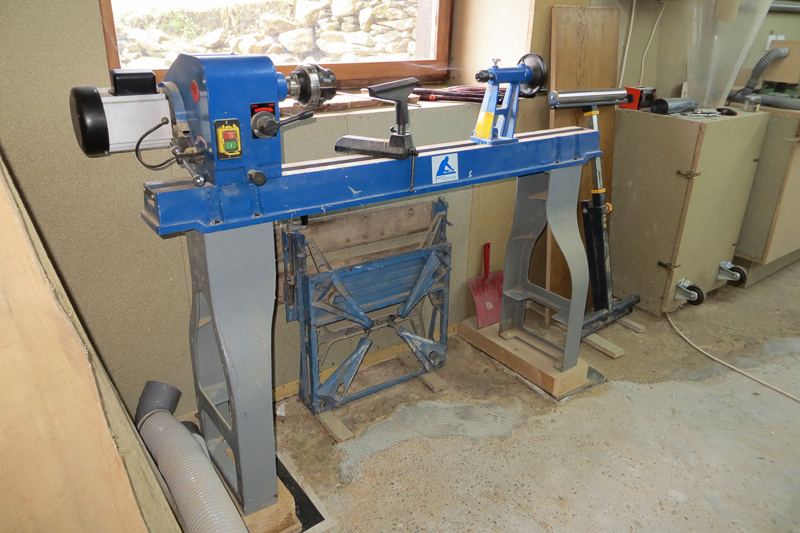
It then stood around for about 6 months while I finished the workshop window because it's planned place was just in front and it was finally installed in early 2015. It came with a faceplate but little else so I've since bought it some turning tools, a 4 jaw chuck, a tailstock chuck and the Wolverine sharpening system. It all works well and has produced quite a few round parts for furniture projects, plus a few goblets and other small objects simply because I couldn't resist it !
Notice the plinth - at 6' 2" I need to raise most tools and the general view is that a lathe should have it's spindle at elbow height - so I've raised it about 10cm and levelled the rather rough floor at the same time.
Stow-away router table
2014, July
I've just finished a new router table. I didnt want ot give up floor space to one since I have a spindle moulder and tend to use the router table for small stuff - so I've built a stow-away version that clips on to the edge of a bench and can be removed and put in the cupboard below when not in use.

It sits partially in front of my chop saw, but doesnt prevent me using it at the same time. The router is the big Triton which has above table height adjustment and access to the collet for bit changes.

Dust is a bit of an obsession for me, so 100mm connection to the dust collection system is a must, there is also a 40mm tube coming up from the plastic dust collector kindly provided by Mr Triton to fit below the table. Seems to work really well - pretty much 100% collected.

The fence clamps to the edge of the table to allow coarse adjustment, and has a screw adjuster for fine tweaks. The 10mm thread has a 1mm pitch which translates to 0.5mm movement of the fence at the middle per turn - I used this on my old router table and it worked fine.
The two fence panels also slide from side to adjust the opening. They are secured by recessed bolts and wing nuts. It is also a few mm clear of the table surface to allow for dust and chips. They could also be swopped for a sacrificial fence when needed.
As you can see, it's all raw mdf at the moment (except the table itself which is a 10mm mdf surface on a piece of salvaged kitchen worktop) and I plan to give it all a coat or two of clear poly to reinforce the mdf. Is polyurethane varnish the thing to use ? Other suggestions welcome.