2015 - projects
2015 projects
- A Greene and Greene style media cabinet
- A new door for the dressing room
- Glazed doors for the kitchen top cupboards
- Fitting out the dressing room
- A new BBQ
A little corner cupboard
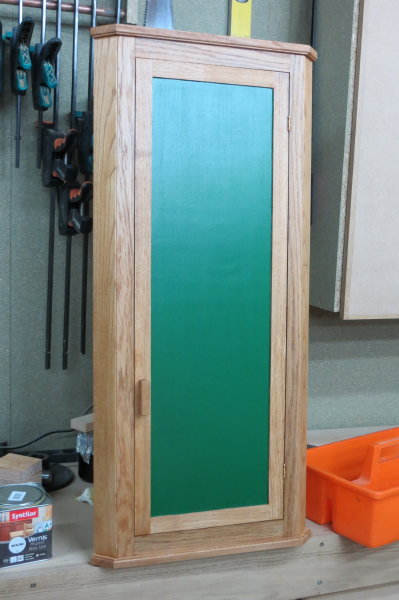
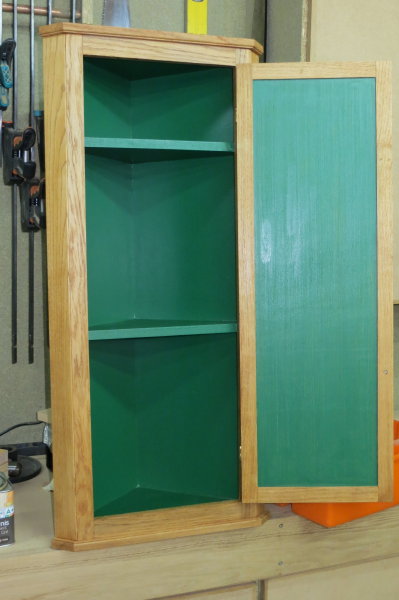
2015, december 2nd - Fed up with untidy bottles of loo cleaner etc and the odd toilet roll laying around in our downstairs toilet, I decided to build a corner cupboard to house it all.
Simple MDF back and shelves, with a nice oak face frame and door to give it a bit of class and to give me something to make ! The plywood door panel is painted to match the woodwork in the loo. Didnt remember to take WIP photos, but there is not so much to show. Here are the pics of the finished job.
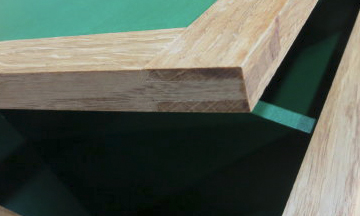
Decided to use bridle joints for the door, just to make a change from cutting regular mortices :
The oak is stained with water based stain then given a coat of clear poly to protect it.
A Greene and Greene media cabinet
2015, march 2nd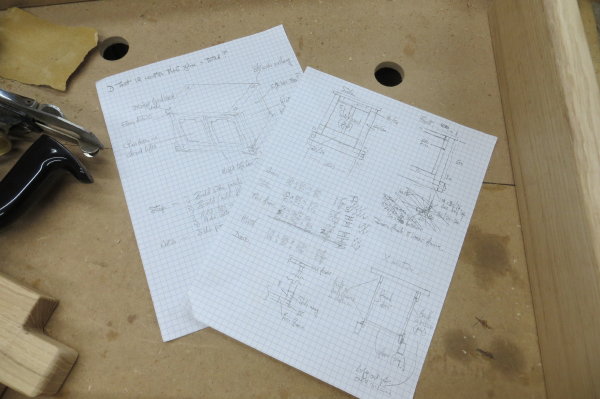 I'm starting a project to make a small (1m wide apx) media cabinet to house the Hi-Fi and telly decoder with the TV on top. Inspired by recent articles in FWW, I'm going for a Greene and Greene style in oak with the classic pegged finger joints, cloud lifts etc. No drawings I could post here, I dont have the patience to do CAD, I work from crude pencil sketches with construction notes.
It will have a finger jointed base frame, frame and panel sides and a face frame with two hinged, glazed doors at the front plus a solid top with oversize breadboard ends.
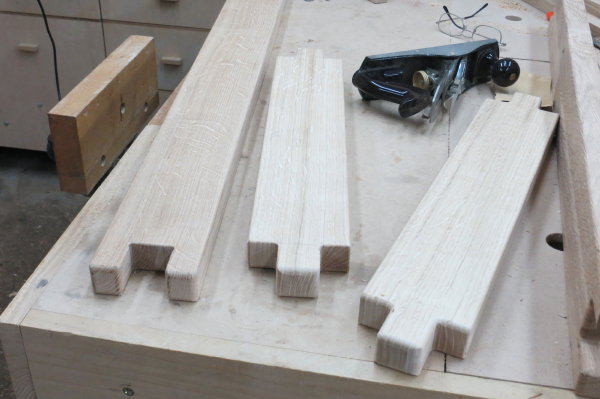
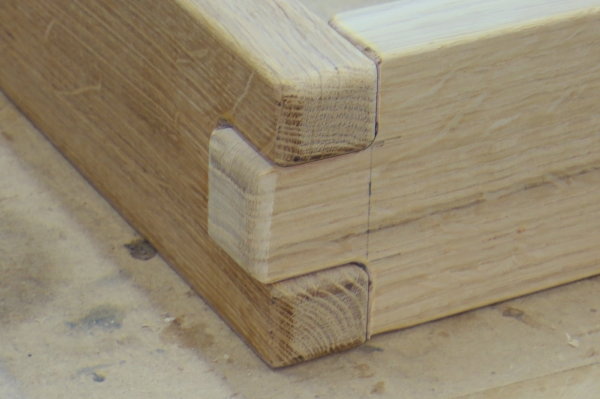
Made a start yesterday by milling up some of the parts, notably the base frame and the components for the face frame in some nice quarter sawn oak, plus it's equivalent at the back (arse frame ?). Then got stuck into cutting the finger joints for the base frame. A recent article in FWW suggests a matching roundover router bit and bearing guided trimmer for the finger profile to create the interlocking curves.
I dont have a small enough bearing guided trimmer, so I drilled the inside corners of the fingers and cut up to the holes with the band saw, then rounded over the edges with a matching radius cutter in the router. Seems to work OK.
2015, March 7th
Bit of progress these last couple of days despite numerous distractions, notably problems with my ancient 4x4 - more of that another time.
Finished preping the frame parts for the frame and panel sides and cut most of the mortices and tenons. Ground to halt when the bit in the hollow chisel morticer snapped off. New ones on order !
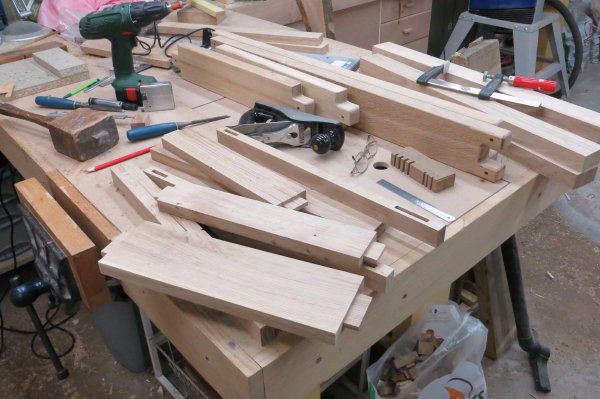 I think I will glue only the bottom third or so of the rather wide tenon (bottom of the frame) to allow the upper edge to move if it wants to.
Next job is to cut the grooves for the panels, on the TS I think.
After that it's the panels - I've found a couple of huge oak boards 2.5m by around 500mm width and 20mm thick in the stock I brought with me from the previous house, I'd forgotten I had them. They should serve very well for the panels.
2015, March 17th
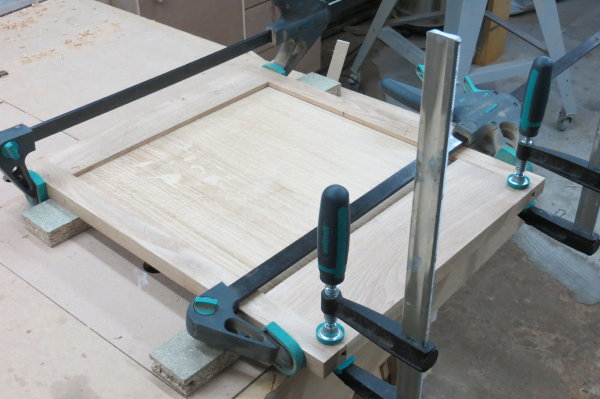 Not had much free time to work on this, but made the two end panels today and got the first one glued up. From what I could find on line, Greene and Greene didnt use raised panels much - mainly solid or flat floating panels as here.
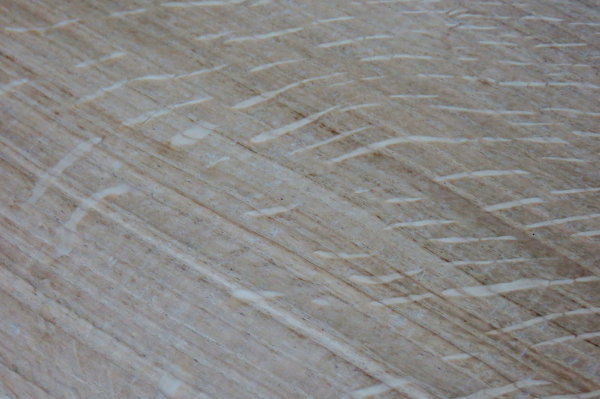
Quite pleased with the ray-fleck in these panels...
2015, March 23rd
Made the doors yesterday. These will be glazed, so just frames, but with shaped parts.
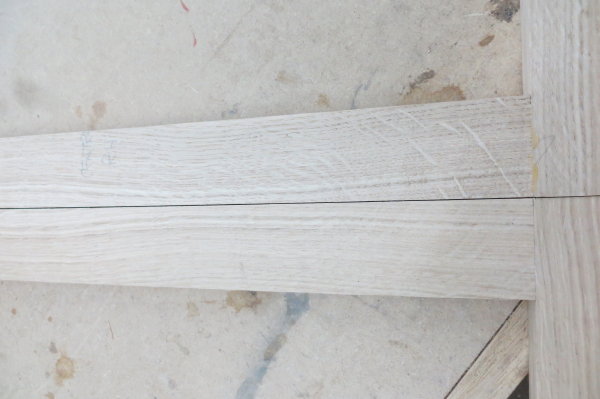
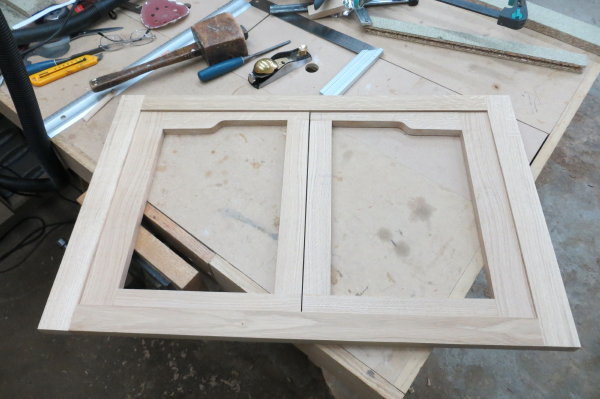 I book matched the central pair of stiles, hopefully it will add something when the finish is applied. Bit of glue squeeze out to deal with I see...
 The construction is a bit unusual in that I wanted the top rails to meet in the middle so as to accentuate the cloud lift effect. This meant cutting tenons on one end of the part and a mortice on the other. No real problem except for getting the shoulders square on the tenon since the part is tapered, so there is only one reference face. Solved that by fitting a temporary guide on the crosscut sled parallel to the main quide so that the stile could be turned over and referenced off the back while still using the same end stop to keep the shoulder position. You have to hold the part against the pressure from the saw but its not too difficult.
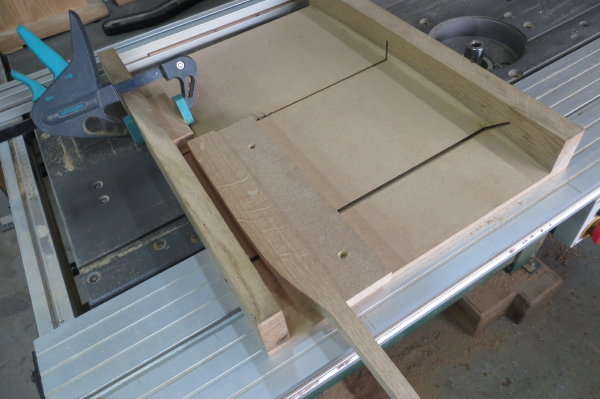
I suppose I could have cut the tenon before shaping the stile, but this worked really well.
Taking the stiles to the edge of the door is not conventional construction, but I seem to recall Woodbloke doing something similar to highlight grain. The doors are quite small and light, so I dont imagine there will be any stability issues.
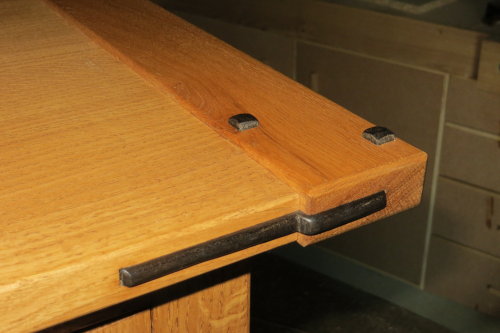
2015, April
I've been a bit lax in posting progress - the job is just about finished by now. Adding the ebony details was a real pleasure, I'd imagined that working ebony would be very difficult, but it turned out to be quite the reverse, it was hard, but not brittle, it cut well with the bandsaw and planed quite easily. The plugs were made by cutting a strip of around the right section, then turning it in the lathe to produce the domed end. Cutting the plug off from the rest was done with a junior hacksaw !
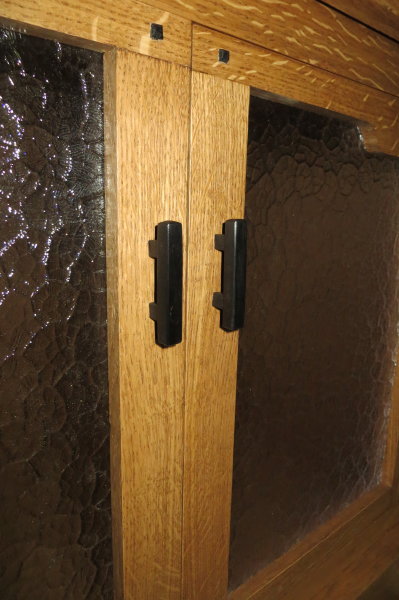
2015, April
I made some handles using scraps of ebony, these were fixed from the front as I did not trust the ebony to hold a screw from the back. The resulting holes were plugged with tapered ebony plugs, turned on the lathe.
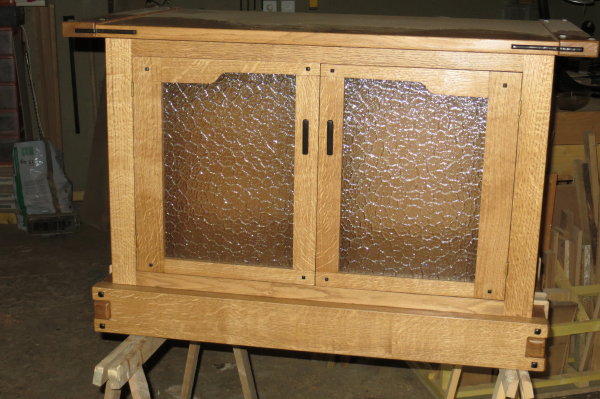
2015, April
Here is the finished job before installation with temporary obscure glass - the plan is to make some stained glass panel, but I need to learn how to do that...
Dressing room door
2015, January 23th 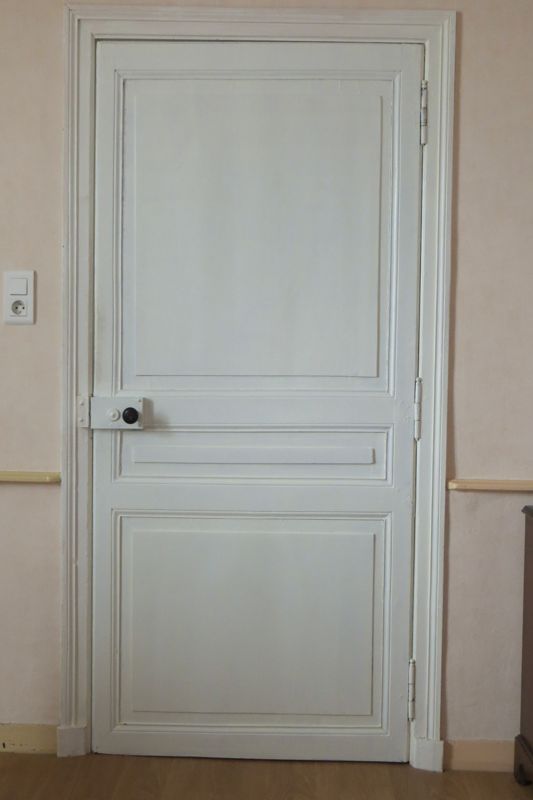 Despite seriously sub zero temperatures, in the last couple of days I've made a few trips to the workshop to mill up the timber for a panelled door. This is for our dressing room which has a frame, hinges etc., but no door. When we bought the house we noted the missing door and noted a spare door stored in the attic and assumed the obvious. Unfortunately, it is not so, the door in the attic is too small by miles !
The plan is to match the other doors in the bedroom (there are two), which were clearly hand made when the house was built around 200yrs ago. No big problem except for matching the mouldings - none of my spindle moulder or router cutters came anywhere near. I've found a cutter from Wealden that looks very close, so I'm now waiting for that in order to get moving on the project. In the meantime, I've cut all the tenons and should have done the mortices today, but it was so damn cold I found other jobs to do in the warm !!
2015, January 25th
No progress yesterday due to extensive social engagements (retirement party lunch for old friend, almost 100 of us sat down at 12h30 and had to leave before the coffee due to another engagement at 18h30 !). However, I have taken a couple of photos of progress so far.
Shoulders cut on the crosscut sled, then cheeks on the vertical tenon jig. Test mortice cut in scrap with hollow chisel morticer used to fine tune the thickness on the first one then just repeat.
To allow for two lots of mouldings, I had to increase the width of the middle two stiles, here one of them is gluing up.
Tenons :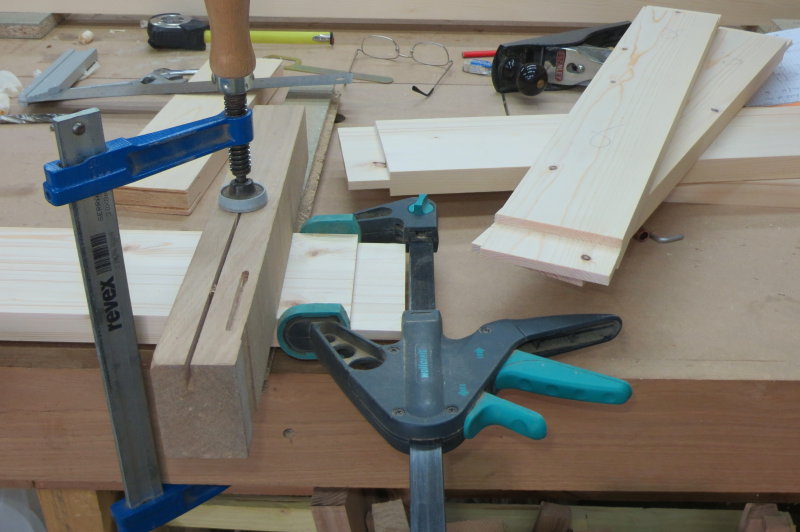
Shop made vertical tenon jig, used with new thin kerf blade - brilliant : 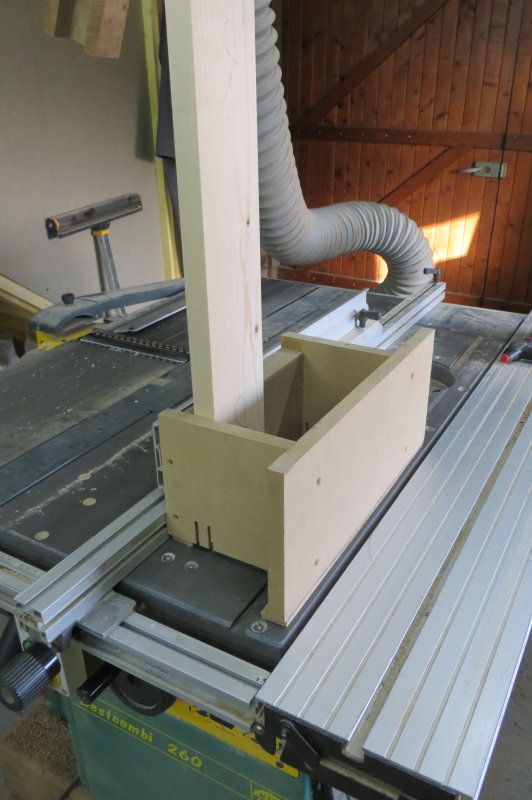
Cutting tenon shoulders on the crosscut sled with a stop block :
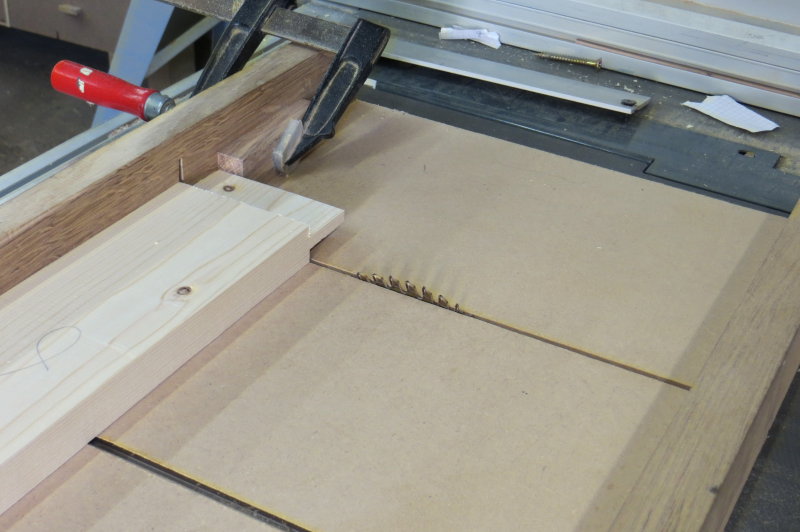
2015, January 27th
Here are the rails with the tenons cut and the miters sawn a tad oversize ready for fitting : 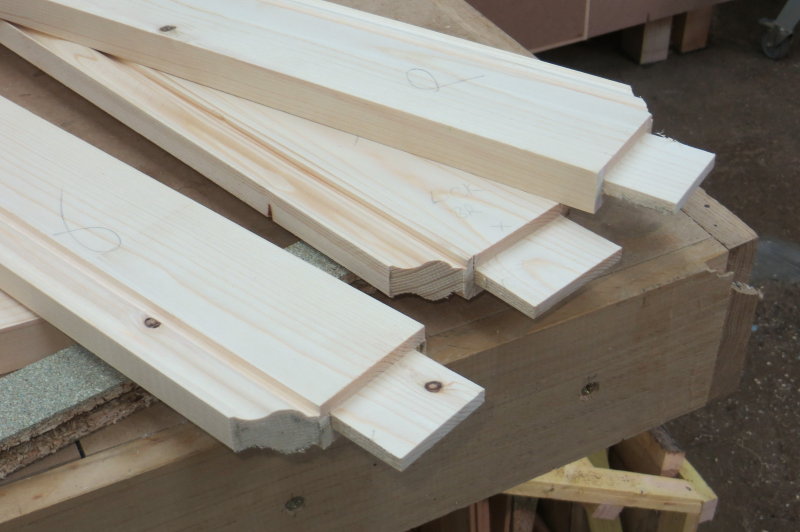
and here is the first joint fitted - wee bit of a gap in the miter, but I understand why so hope to do better on the next one ! 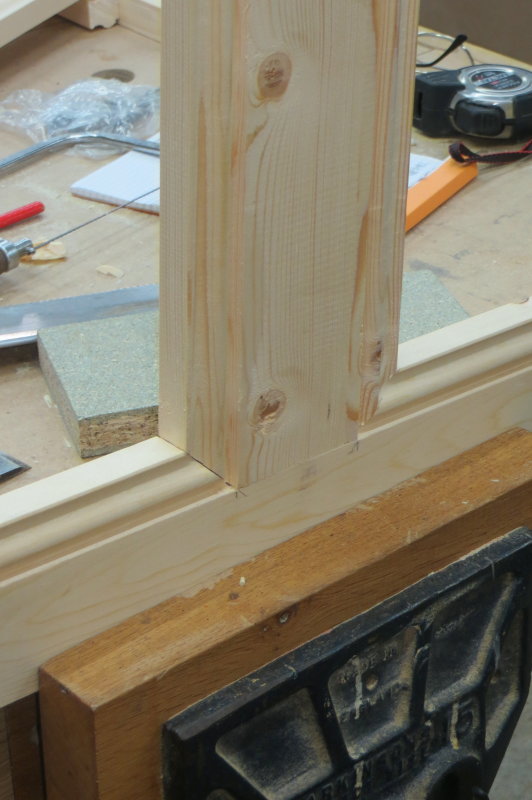
I propose to cut the slots for the panels by multiple passes on the TS after all the other jobs as I'm a bit nervy about the very thin mouldings - not convinced that routing the profile in a thin wall after cutting the slot would have worked out well.
2015, January 28th 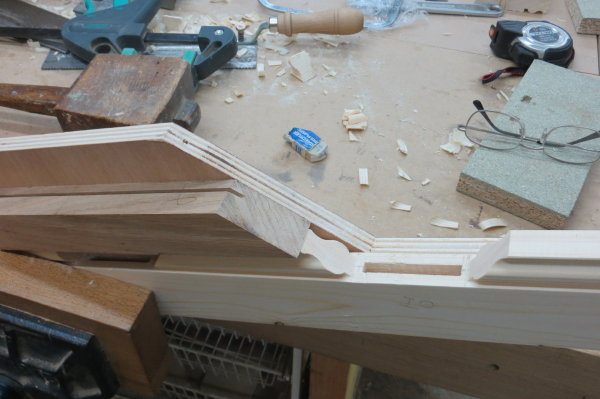 All the joints trimmed and fitted today, just remains to buy the MDF for the panels before cutting the slots - I dont trust the nominal thickness enough to cut the slots first - then I can assemble it !
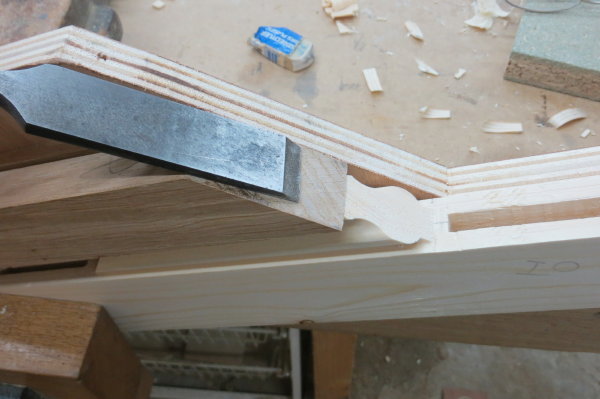 This is the little chisel shooting board I used to trim the miters :
It's an oak scrap cut very carefully to 45°, then screwed and glued to a ply back to help hold it in place. I've glued 100 grit abrasive paper to the side of the ply and the bottom of the oak where it registers on the top of the workpiece so that it grips well when clamped.
2015, January 29th
It's assembled ! I fetched the mdf for the panels this morning, cut the slots with 4 passes on the TS with everything held tightly by feather boards side and top, then did the glue up. Had to improvise a bit for the clamps, but we got there. Given that the panels are stable, I decided to glue them in to help keep the door square since the rails are quite narrow. 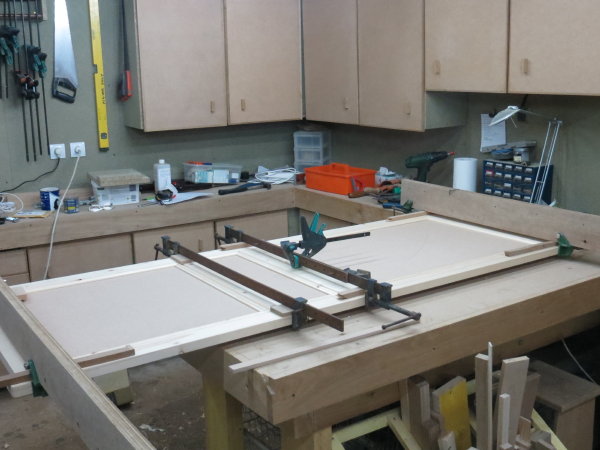
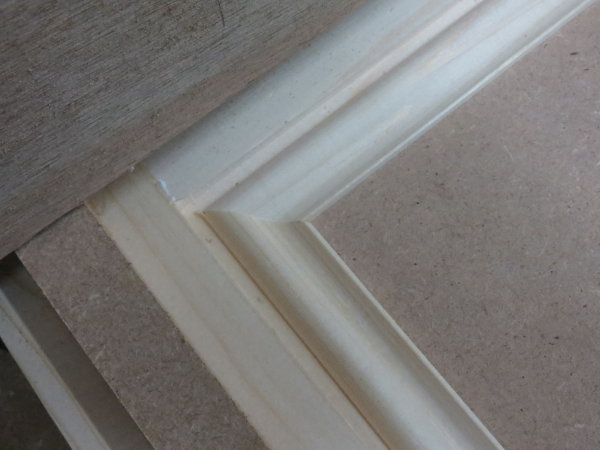 The joints done with the little shooting board came together quite well :
The panels on the original doors are raised by a few mm, but I hate machining mdf, so I will do mine by gluing on a centre panel rather than by starting with a thick one and making the cuts to "raise" it. Happily, the originals have a simple stepped edge to the raised part, so I can get away with cheating. All finished tomorrow I hope.
2015, February 5th
It's fitted ! Quite a job ! The door frame was quite a way out of square, but I knew that and had made the door a bit oversize to give me some leeway for trimming it. What really threw me at first was that the uprights of the frame turned out to be curved (side to side, not front to back) by nearly 1 cm. So a lot of planing and tweaking especially to keep the hinges aligned. LOML will undertake the painting. 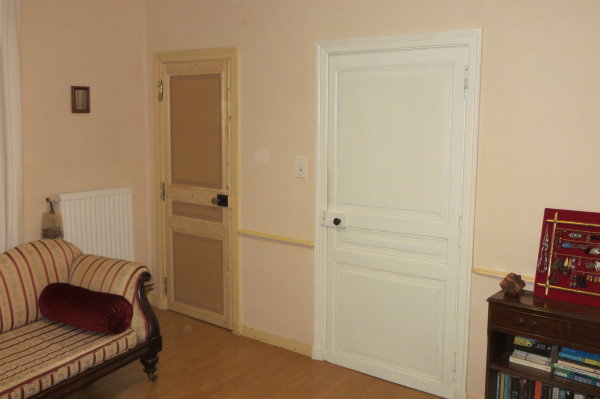
I'm quite pleased with it, subject to one annoying sort of error. I aligned the stile for the lock with the fitting already there on the frame and then copied the proportions of the panels from the other doors. However, I hadnt noticed that the orignal builder had not aligned the lock properly with the other door, it's a couple of cm higher and I copied it. If I had noticed I would have moved the lock down to line up with the others. Too late now !
Kitchen cupboard doors
2015, January 8th
Made a start on some glazed doors for the three kitchen wall cabinets installed recently. The doors are in oak, M&T construction and profiled to match the other cabinet doors in the kitchen. Not a big job, a nice gentle start to the year !
Progress was interrupted by the need to do some emergency plumbing - the water went off at around 2pm on wed., I called the Mairie and they said there was a repair job going on that required a supply cut for a few hours, so I thought no more about it. By early evening I was sarting to get concerned - toilets looking less than inviting etc. Thurs morning at 9am I called the Mairie again and they said, no, it's back on. A quick check and yes, there was water at the stop cock, but nuttin at the taps ????
A bit of theoretical detective work suggested a failed pressure regulator. Down into the cellar, closed the stop cock, started to remove the regulator and got a cold shower, stop cock not working either ! Quickly closed the valve on the supply side of the meter outside - happily I knew where it was. Further dismantling explained the failed regulator, it was full of bits of debris from the disintegrated stop cock. A real mess, bits of washer of course but also shards of brass from stripped threads etc. Presumably the supply cut, or more likely the surge when the supply came back on, picked up the debris and blocked the regulator. A quick trip into town for spares and then replaced both stop cock and regulator.
As a result of lots of practice (mainly unwilling) I'm pretty competent at plumbing, but I hate it. Usually cold and wet, always in cramped spaces, messy sealing compounds, corrosive flux for soldered joints - UGHHH !!!
2015, January 10th
Almost finshed sealing the workshop to make heating possible. The long term plan is to install 3m wide sliding patio doors inside the wooden barn doors. This will provide the closure and insulation etc., and still allow loads of light when the barn doors are open. This is the best compromise I can come up with as the planners wont let me change the barn doors because we are in a very strict conservation area close to the local church (12thC) that is a national monument. However... budgets dictate wating 'till next winter to fit the patio doors.
In the meantime, I've got a stove and loads of offcuts, but there is a 5cm (irregular) gap under the barn doors and the wind negates the work of the stove. Found a good temporary solution in a GSB (grande surface bricolage) yesterday, a sort of stiff brush mounted on a plastic rail to screw the bottom of the door. Available in 2m lengths at a sensible price, it works a treat !
2015, January 13th 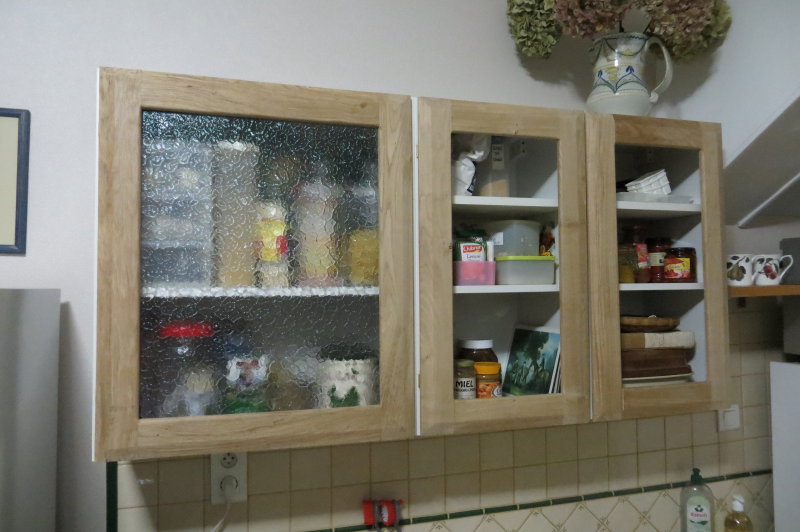 Finished the joinery of the three cupboard doors yesterday. As noted below, these are in oak, M&T joints and profiled to match the rest of the kitchen.
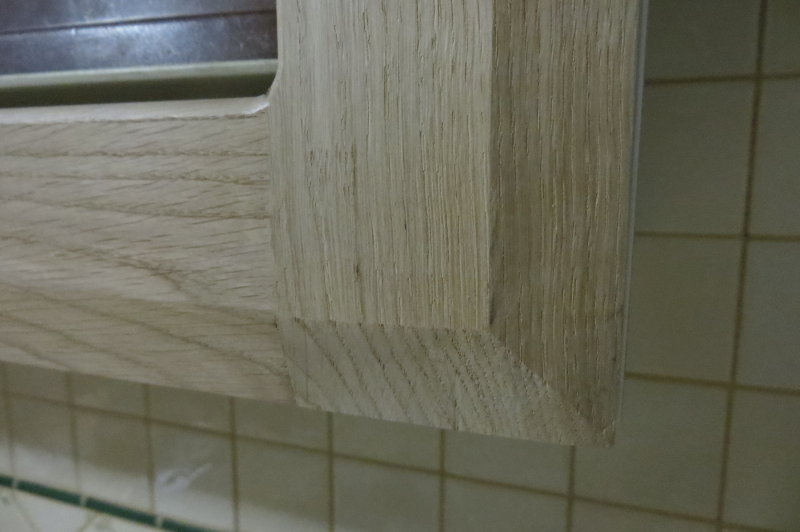
To keep the weight down, (it's all hanging on a plasterboard wall) I made them quite thin, then later realised they were too thin to use normal kitchen furniture hinges ! Damn !!
I've fitted them using some small brass hinges I happened to have in stock, but lining everything up was a bit of a nightmare, especially since the cupboards carcasses (budget DIY shed jobs) turned out to be not quite square. We chose semi-obscure glazing so you cant see every detail of half used packets, but there is still a bit of colour/texture visible (one fitted temporarily to show the effect). Plain wooden doors are, well, rather "plain".
2015, January 20th 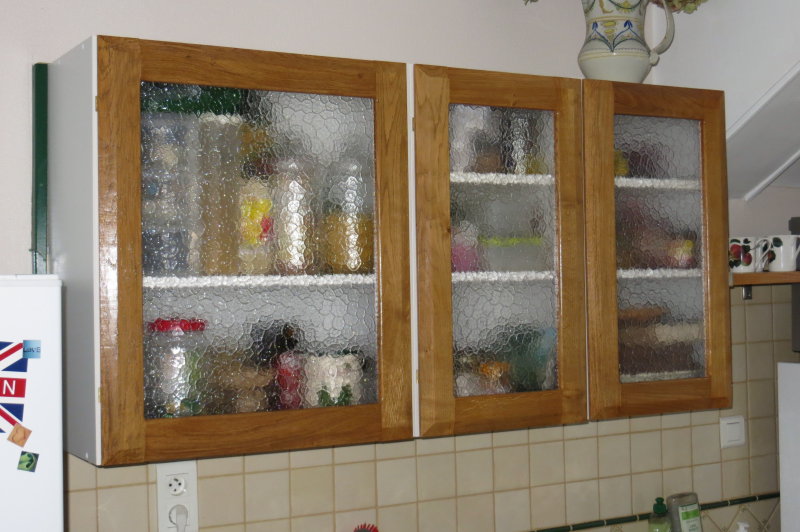 Isabelle has finished the cupboard doors with three coats of lasure to match the bottom cupboards and I then fitted the glazing. Much easier to finish without the glazing panels in...
I've also made some little mag catches using rare earth magnets glued into holes (8mm) drilled into the doors and matching ones in small adjustable wood blocks attached to the cupboard sides. They are spaced so that they just dont make contact - I find that the pull works fine like that and that if you let them contact, the force needed to open the door is too great for comfort. The one last thing needed is the handles, I'm waiting for a delivery !
The dressing room fitted out
2015, September 3rd
More of a big walk-in wardrobe really, but since it has a proper door and even a window, we dignify it with the title dressing room !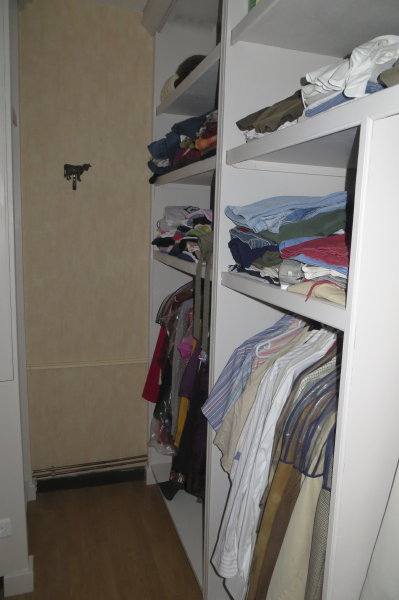
This has been an on-going project for some months, odd hours of work fitted in amongst more pressing stuff. However, today I moved the tools out and the clothes in ! I should stress this is not fine woodwork, this is basic built-in using painted mdf and even some screws....
View from the doorway - difficult even with a wide angle lens, but I'm sure you get the idea. The cupboards are 60cm deep to allow full width for jackets etc. 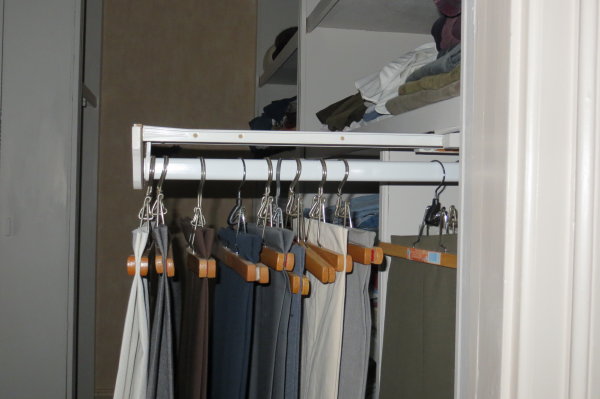 There is a pull out hanging rail at 90° to make full use of the depth for trousers
The other side has a shallow cupboard for full length coats etc, plus a "window seat". This is also where the big cable to the workshop is hidden on its way to the roof space.
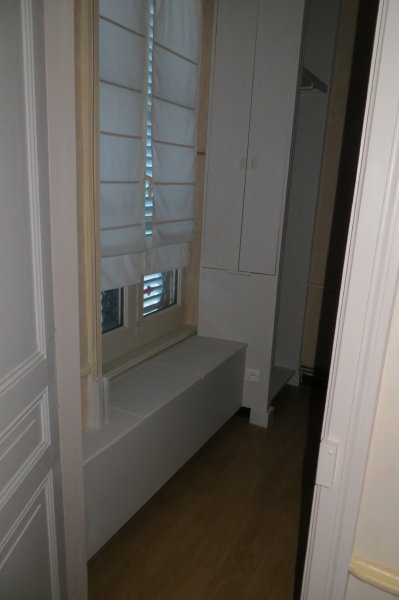
The window seat lids lift to give access to his and hers laundry baskets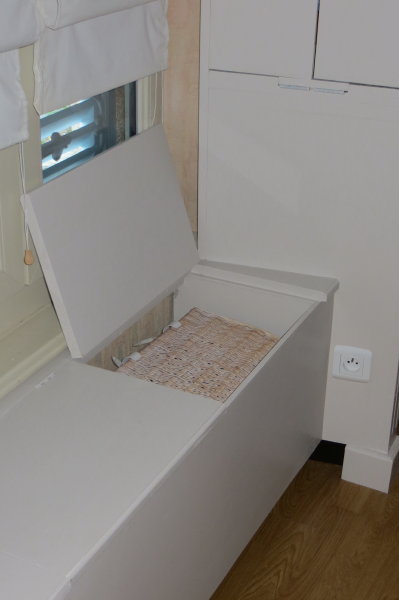
Then the bit that really amused Isabelle, the doors in the side of the shallow cupboard open to reveal an ironing board that hinges down 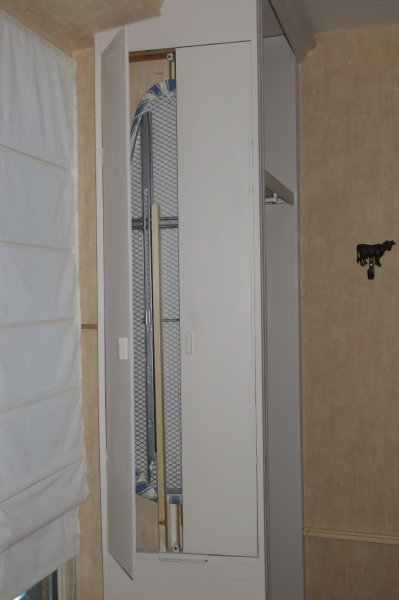
Here it is fully deployed, supported by a slide in bracket that lives in the front of one of the laundry baskets. There is a power point in the base of the cupboard to power the iron.
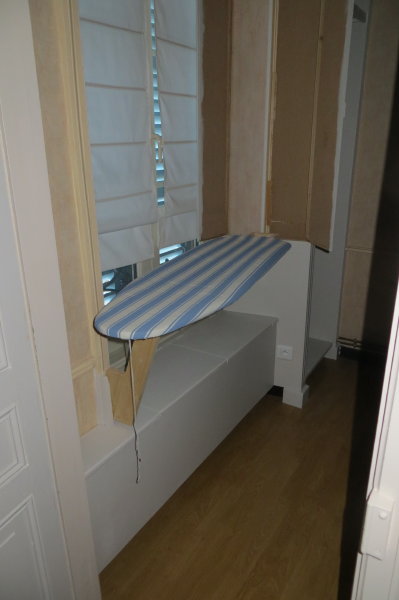
Just realised that in my haste to finish, I've not painted the inside of the ironing board cupboard. Damn !
Also, the photos show up the 'orrible heating pipes on the back wall - must find a way to hide those...
BBQ
2015, june 5th
Not exactly woodwork, but a project for the house - so here goes :
The walled courtyard at the back of our house has a chimney and all the fittings for cooking outdoors, but it dated from 1800 or so. I decided to convert it to a BBQ.
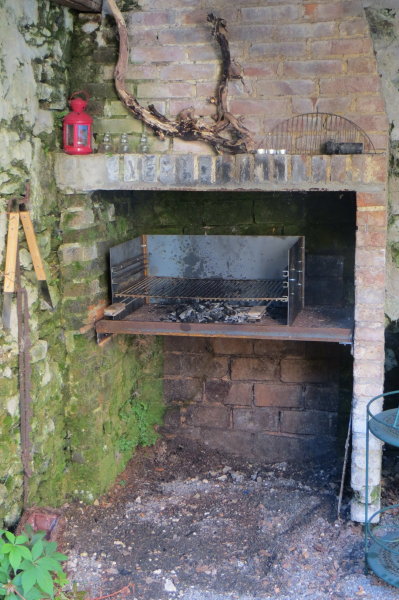
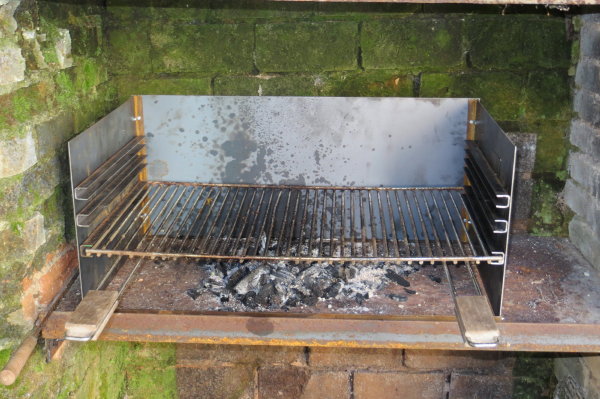
The first step, and the hardest, was to cut a steel plate 12mm thick, to size to act as a base. No, I didnt choose it, it just happenend to be here !
2hrs with a big angle ggggrinder and some cutting and fixing some big lumps of angle to support it, and we have a base.
Then bt some 2mm steel sheet, some angle and some channel and voila the result :
It's all screwed together as I dont have welding gear, but seems solid enough.
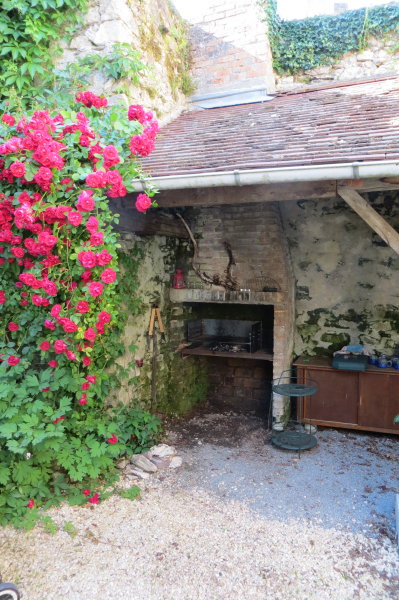
Here it is from a bit further away to see the effect :
Works very well !! 
